Set up e-mail for your domain
Add e-mail hosting for a domain and create your first mailbox.
E-mail hosting gives you mailboxes on your own domain, such as info@yourdomain.com. You first add the e-mail service for the domain and then create mailboxes in it.
Important
E-mail hosting is offered only in the Premium plan. Every e-mail domain uses one e-mail slot of a Premium subscription.
Add the e-mail service
Start the wizard
Sign in to the Control Panel, go to E-mails and click Add e-mail service.
Select the plan
Click Select PREMIUM e-mail. Free e-mail is not available.
Enter your domain
Type the domain without www., for example
yourdomain.com, and click Continue.Choose the subscription
Pick the Premium subscription whose slot the e-mail service should use and click Continue. If the subscription has no free e-mail slot left, pick another one or click Add capacity.
Choose the datacenter
Select the Europe Datacenter or the USA Datacenter — the one closest to the people who will use the mailboxes — and click Create E-mail.
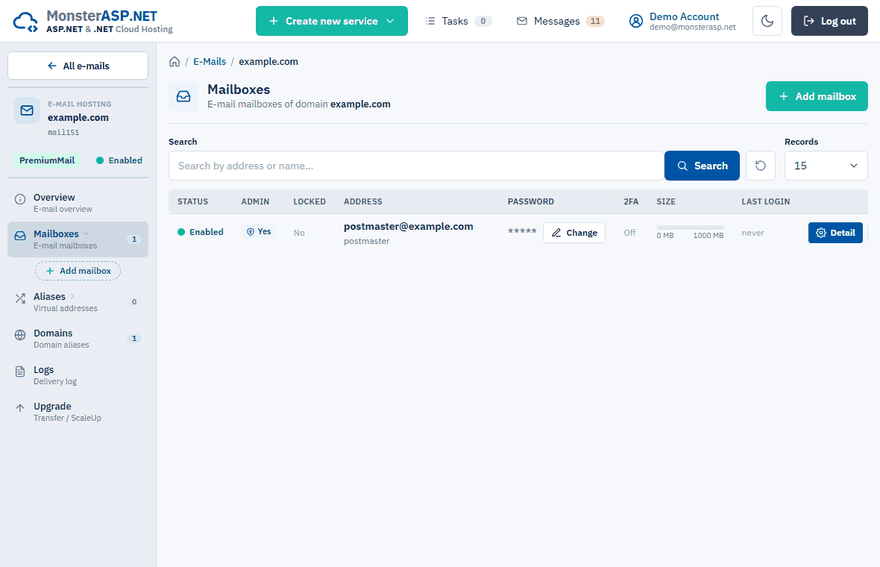
The e-mail hosting is prepared in the background and appears in your E-mails list within a few moments. It starts with one mailbox, postmaster, the domain administrator mailbox. Its login details are on the Overview page in the Access to E-mails card.
Note
Mail is delivered to your mailboxes only when the DNS of your domain points to our mail server. See DNS records for e-mail.
Create a mailbox
Open the mailbox list
Go to E-mails, click Manage next to your domain and choose Mailboxes in the left menu.
Click Add mailbox
Fill in the Address — the part before
@, for exampleinfo.Set the password
Enter a Password or click Generate to get a strong one. The password must have at least 8 characters with an uppercase letter and a digit.
Set the quota
Enter the Quota in MB or use a Quick pick value (500 MB, 1 GB, 2 GB, 5 GB, Max available). The minimum is 100 MB; the maximum is the free space left in the Domain storage of your e-mail domain.
Save
Click Add mailbox.
Manage a mailbox
Each row of the Mailboxes list has these actions:
| Action | What it does |
|---|---|
| Change | Sets a new password for the mailbox. |
| Detail | Shows the login details, an IMAP Test login, the quota and the forwarding settings. |
| WebMail | Opens the mailbox in WebMail and signs you in automatically. |
| Delete | Removes the mailbox. |
If a mailbox shows Password is locked in its detail, too many failed sign-in attempts locked it. Change the password to unlock it.