Add a DNS zone
Create a DNS zone for your domain and switch its name servers to ours.
A DNS zone holds all DNS records of a domain. When you add a zone in the Control Panel and switch the nameservers of the domain to ours, you manage the DNS of the domain in one place — next to your websites and e-mails.
No registrar transfer is needed. The domain stays where you bought it; only its nameservers change.
Important
DNS hosting requires an active subscription.
Add the zone
Open the DNS section
Sign in to the Control Panel and choose DNS in the left menu.
Start adding
Click Add DNS zone.
Enter the domain
Type the domain into Domain name, for example
example.com. Enter it withoutwww.and without the protocol (https://). A subdomain such asshop.example.comworks too.Create the zone
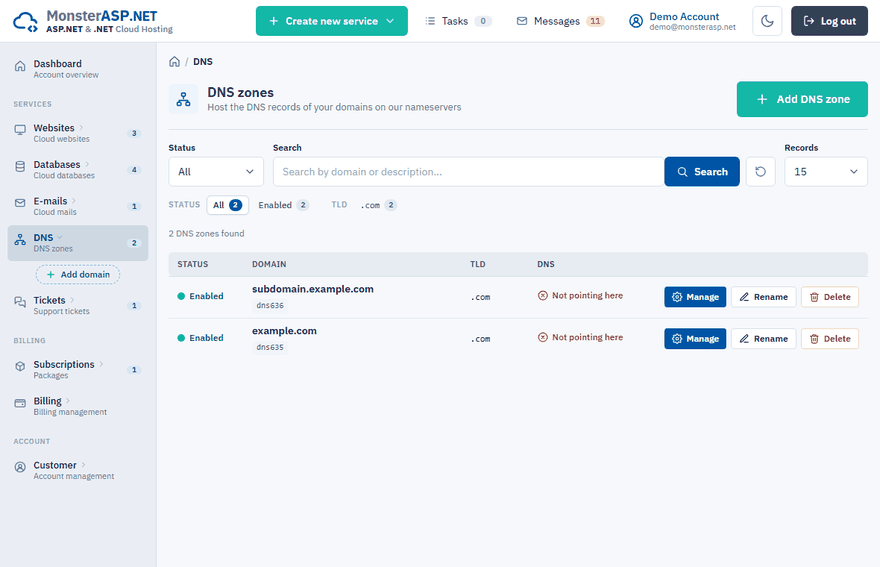
Click Add domain. The zone appears in the DNS zones list.
Switch the nameservers
Records in the zone take effect only after the nameservers of the domain point to ours. Sign in at your domain registrar and set the nameservers of the domain to:
ns1.machineasp.net
ns2.machineasp.net
ns3.machineasp.net
Nameserver changes can take up to 24 hours to propagate worldwide.
Check that the domain points to us
Click Manage on the row of the zone. The Overview card shows the nameservers to use, and the DNS status card shows what the domain really uses right now. Click Refresh to check again.
| Status | What it means |
|---|---|
| Nameservers set correctly | All 3 nameservers point to our DNS. The records in the zone take effect. |
| Partial nameserver setup | Only some of the nameservers point to us. Records may behave unpredictably until all 3 are set. |
| Nameservers not pointing here | The domain uses other nameservers. Records you set in the zone have no effect. |
| DNS check inconclusive | The check could not be completed. Try Refresh in a moment. |
Point the domain to a website or a mailbox
You do not have to create the records by hand. On the zone page, the DNS easy card does it for you:
- Under Website, choose one of your websites and click Save.
- Under E-mail, choose your mail server and click Save.
The matching records (CNAME, MX, TXT) are added to the zone. Open What records will this create? to see them in advance. They appear in DNS records below, where you can fine-tune them at any time — see Manage DNS records.
Add a note to a zone
Click Rename in the list (or Change next to Name on the zone page) to add a Description — your own note such as client project. It is shown only in the Control Panel. The domain of a zone cannot be changed.
Delete a zone
Click Delete on the row of the zone, tick the confirmation and click Delete DNS zone.
Warning
All DNS records of the domain are removed from our nameservers and this cannot be undone. If the domain still points to our nameservers, it stops resolving — websites and e-mail on it become unreachable until DNS is hosted elsewhere. The websites, databases and e-mail hostings themselves are not deleted.
A newly created zone can be deleted after at least one minute.