Set up DKIM
Sign outgoing messages with DKIM to improve deliverability.
DKIM (DomainKeys Identified Mail) adds a cryptographic signature to every outgoing e-mail, so recipients can verify that it really came from your domain and was not altered on the way. It improves deliverability and makes spoofing of your domain harder.
Turn on DKIM
Open your e-mail domain
Sign in to the Control Panel, go to E-mails and click Manage next to your domain.
Enable DKIM
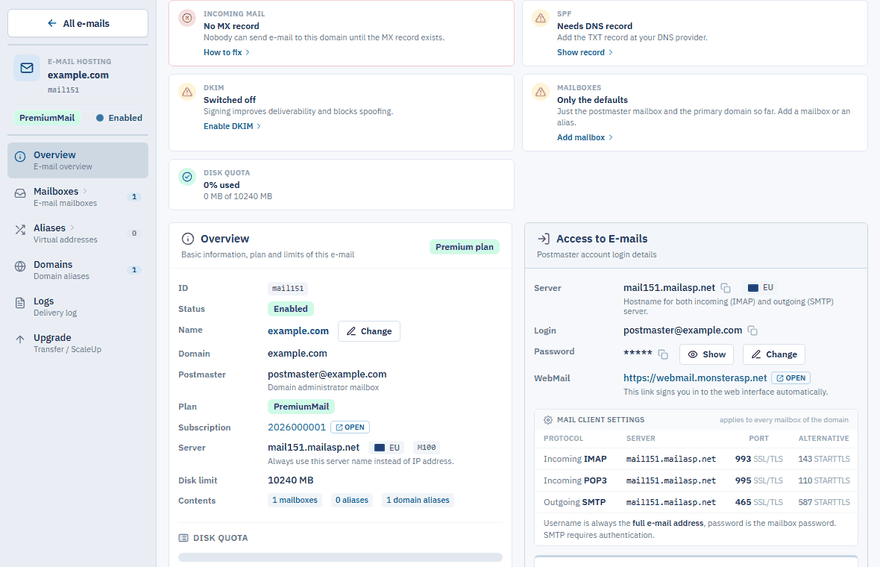
On the Overview page find the DKIM card and click Enabled.
Check how the record is published
The note under the switch tells you what happens next. Set up automatically means your domain uses our name servers and the DNS record is published for you. Manual DNS setup required means your domain uses external DNS and you have to add the record yourself.
Add the record at an external DNS provider
If your domain does not use our name servers, switching DKIM on only prepares the record in our zone — the internet does not see it. Copy it to your DNS provider:
Open the record
In the DKIM card expand DNS TXT record. It shows the Type (
TXT), the Name and the Value of the record.Copy the values
Use the Copy icon next to Name and Value so that you do not mistype the long key.
Create the TXT record
At your DNS provider add a TXT record with exactly this name and value.
Note
The name and value are generated for your domain, so always copy them from the Control Panel. The name has the form <selector>._domainkey and the value starts with v=DKIM1; k=rsa; h=sha256; p= followed by the long public key.
If you manage the DNS of the domain with us but the record is missing, add it in the Control Panel under DNS → your domain — see Manage DNS records. DKIM becomes active once the DNS change has propagated.
DKIM status
| Status | Meaning |
|---|---|
| Active | The DNS record was verified. Outgoing mail is signed and verified. |
| Pending DNS | DKIM is switched on, but the DNS record is not verified yet. With external DNS, add the TXT record; with our name servers, wait for the DNS verification. |
| Off | DKIM is switched off. |
The DKIM tile of the Setup checklist at the top of the Overview page shows the same status.
Turn off DKIM
Click Disabled in the DKIM card. We recommend keeping DKIM Enabled.
Tip
DKIM complements SPF. Keep both enabled — see DNS records for e-mail.