Upload your own certificate (PFX or PEM)
Use a certificate from another certificate authority for a domain.
If you already own an SSL certificate from another certificate authority, registrar or provider, you can install it for a domain instead of the free Let's Encrypt certificate. The Control Panel accepts two formats: a single PFX file, or the PEM/KEY text of the certificate and its private key.
Note
Unlike Let's Encrypt, custom certificates do not renew automatically. You have to upload the new certificate yourself before the old one expires.
Open the HTTPS dialog
Open your website
Sign in to the Control Panel, go to Websites and select your website.
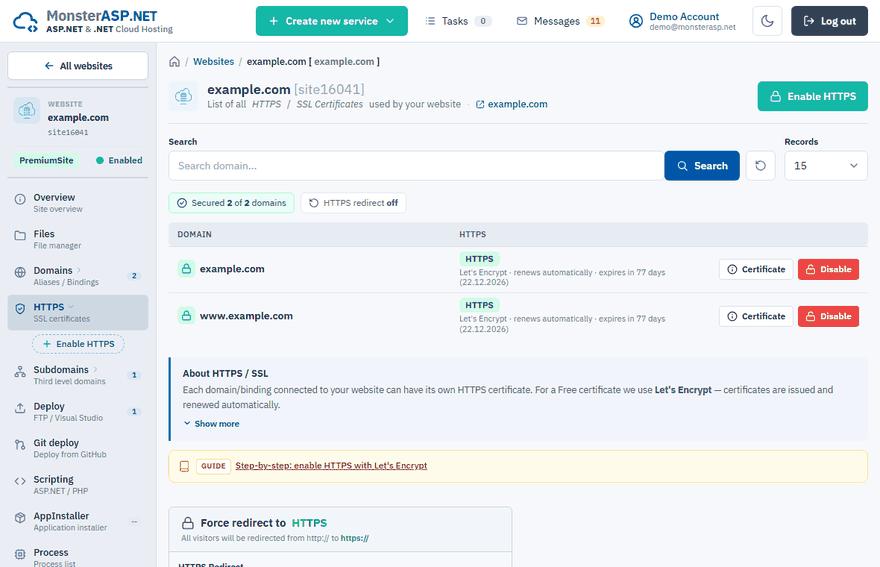
Open the HTTPS page
In the left menu choose HTTPS.
Choose the domain
Click Enable HTTPS on the row of the domain. For a domain that already has HTTPS, click Certificate instead.
Choose the certificate format
In the dialog switch from Let's Encrypt to Custom PFX or Custom PEM/KEY.
Upload a PFX file
A .pfx (PKCS#12) file bundles the certificate, its private key and the chain into a single encrypted file. It is the standard export format from IIS, Windows and most certificate providers.
Upload the file
Click Upload PFX, choose your
.pfxfile (or drop it into the dialog) and click Upload. The maximum file size is 10 MB.Enter the password
Fill in Certificate password — the same password that was set when the file was exported. Leave it empty only if the file truly has no password.
Activate
Click Enable HTTPS.
Important
The .pfx file must include the private key. That is what makes it different from a plain .cer / .crt file.
Paste a PEM certificate and key
Use this format if your certificate consists of a separate certificate file and private key file in the PEM text format.
Paste the certificate
Copy the content of the PEM/CRT file into Certificate (PEM/CRT file content).
Paste the private key
Copy the content of the KEY file into Private key (KEY file content).
Activate
Click Enable HTTPS.
Paste the complete content of each file, including the -----BEGIN...----- and -----END...----- lines — a partial paste is rejected. The private key can be in the RSA PRIVATE KEY or the plain PRIVATE KEY (PKCS#8) format.
Activation itself is instant, but it can take up to 10 minutes before https:// works reliably for every visitor.
Check the installed certificate
Click Certificate on the row of the domain. The Certificate details dialog shows:
| Field | What it tells you |
|---|---|
| Common name (CN) and Also valid for (SAN) | Every host name the certificate secures. The domain must match one of them, otherwise browsers show a security warning. |
| Issued by | The certificate authority. |
| Expires | After this date browsers treat https:// as insecure. Upload a renewed certificate before it. |
| Thumbprint | The unique fingerprint of the certificate. |
Warning
Cannot be used for web server means the file is a valid certificate, but not one issued for website authentication (for example a client or code-signing certificate). Replace it with the correct type.
Free plan
If the dialog says HTTPS is not enabled, HTTPS is turned off for the website. It is included with Premium; on the Free plan open a support ticket and request manual HTTPS activation.
Remove the certificate
Click Disable on the row of the domain and confirm with Disable HTTPS. Be careful: disabling HTTPS can break a website that requires it, for example one with the HTTPS redirect switched on.