How to create DKIM
This article contains steps how to create a DKIM signature.
ASP.NET / .NET freehosting
If you don't already have our ASP.NET / .NET freehosting, sign up for FREE at https://MonsterASP.net/.
1. Control Panel
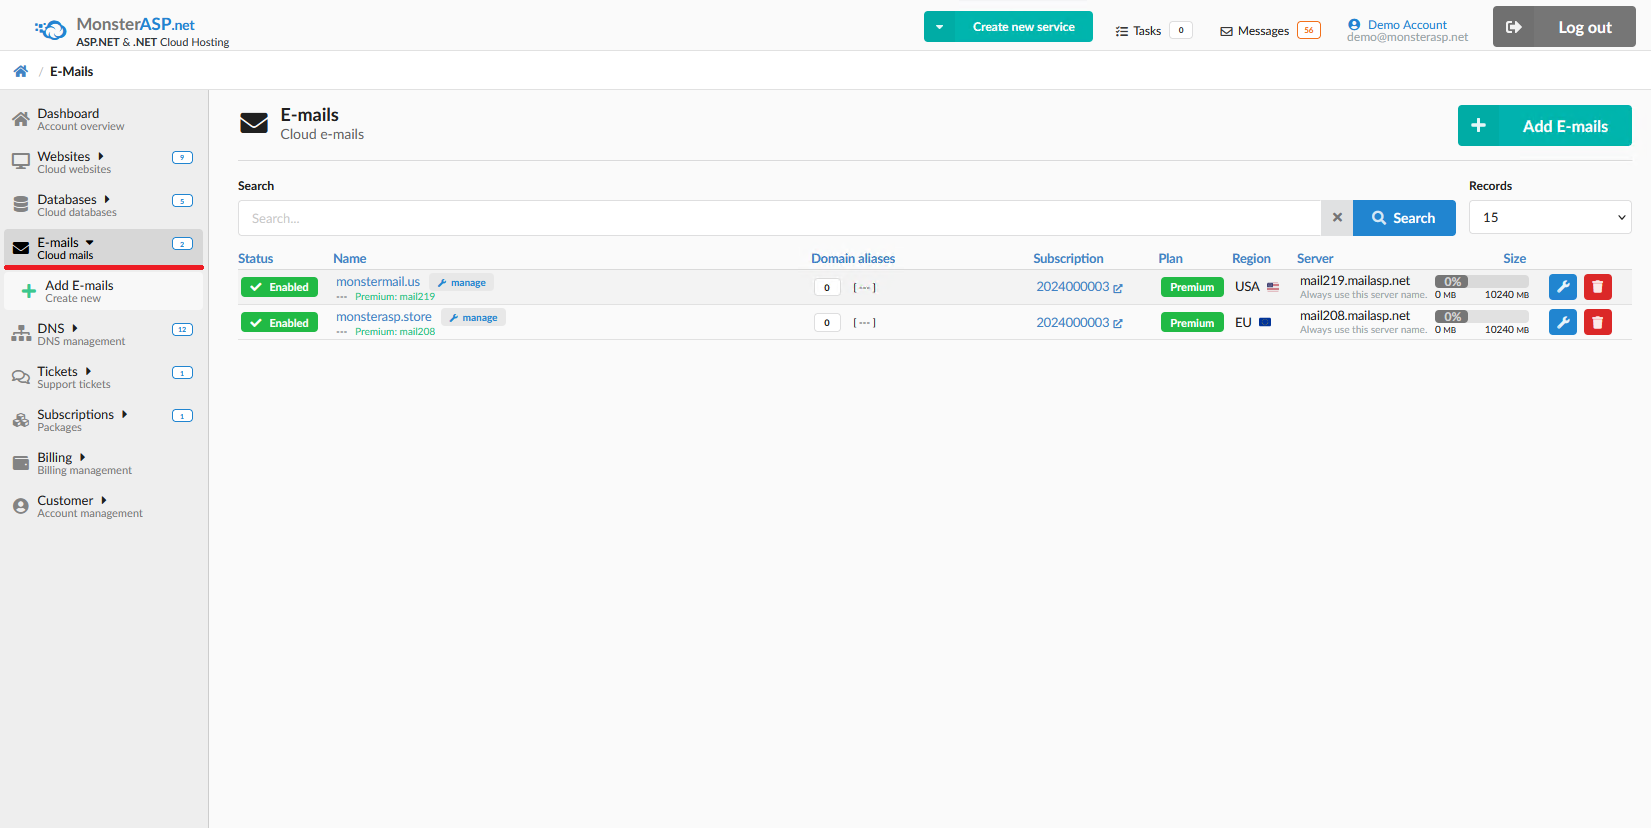
After logging in to the administration, click on the "E-mails" icon and select the domain for which you want to create the DKIM signature. In our case, it will be for the domain monsterasp.store, for example.
2. Overview and login to webmail
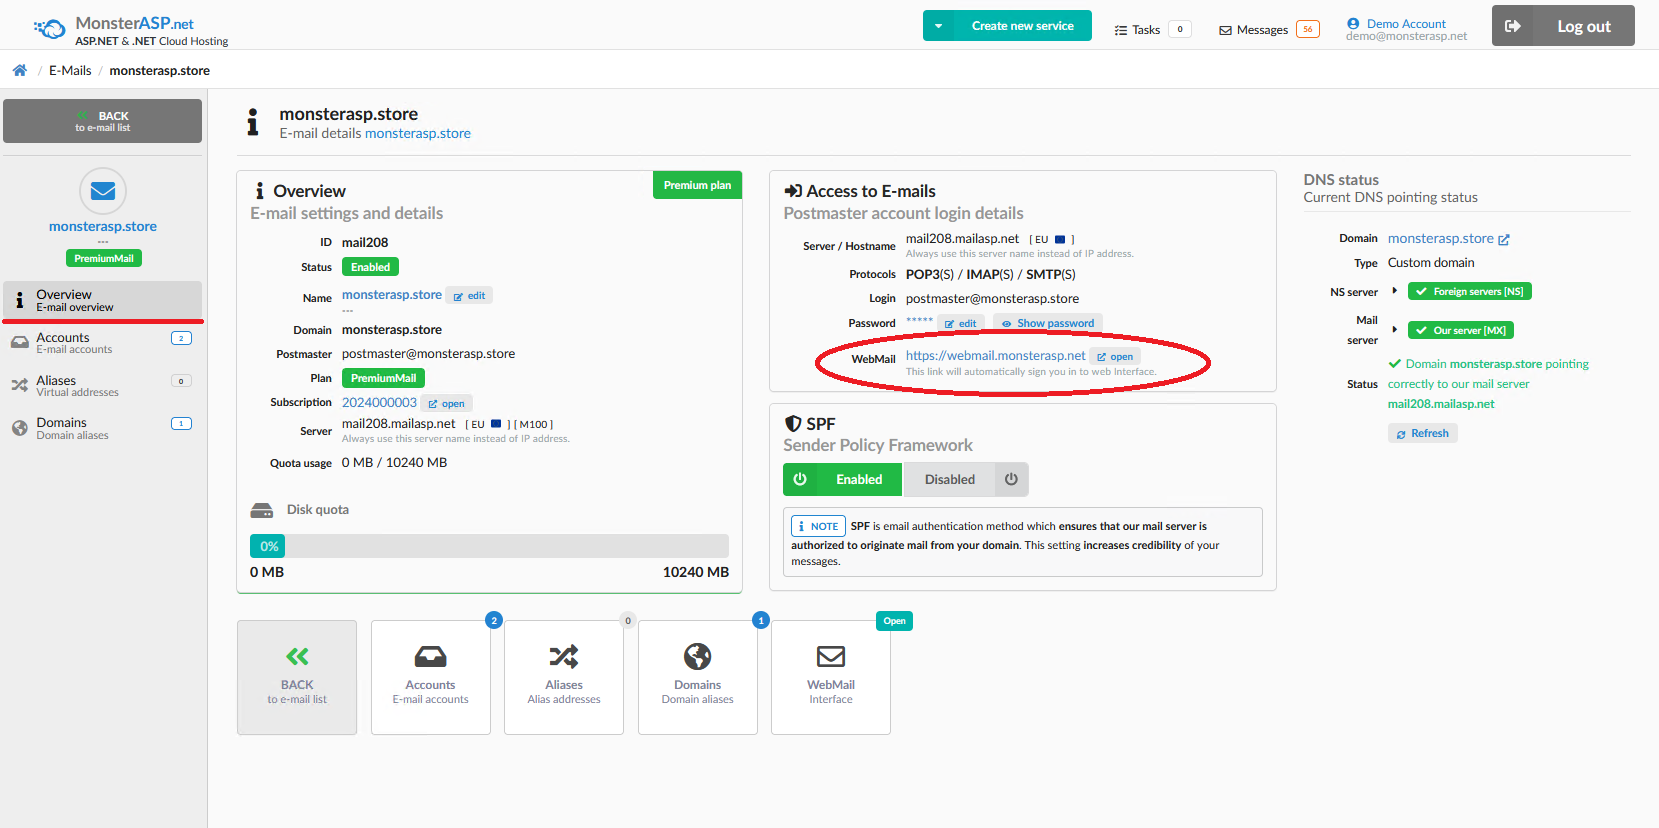
After selecting the domain for adding the DKIM, click on the webmail address under the "Access to E-mails" section — https://webmail.monsterasp.net. A new browser tab will open with our webmail, and you will be automatically logged in as postmaster — the administrator of your email domain.
3. Create DKIM
In the webmail, follow these steps:
-
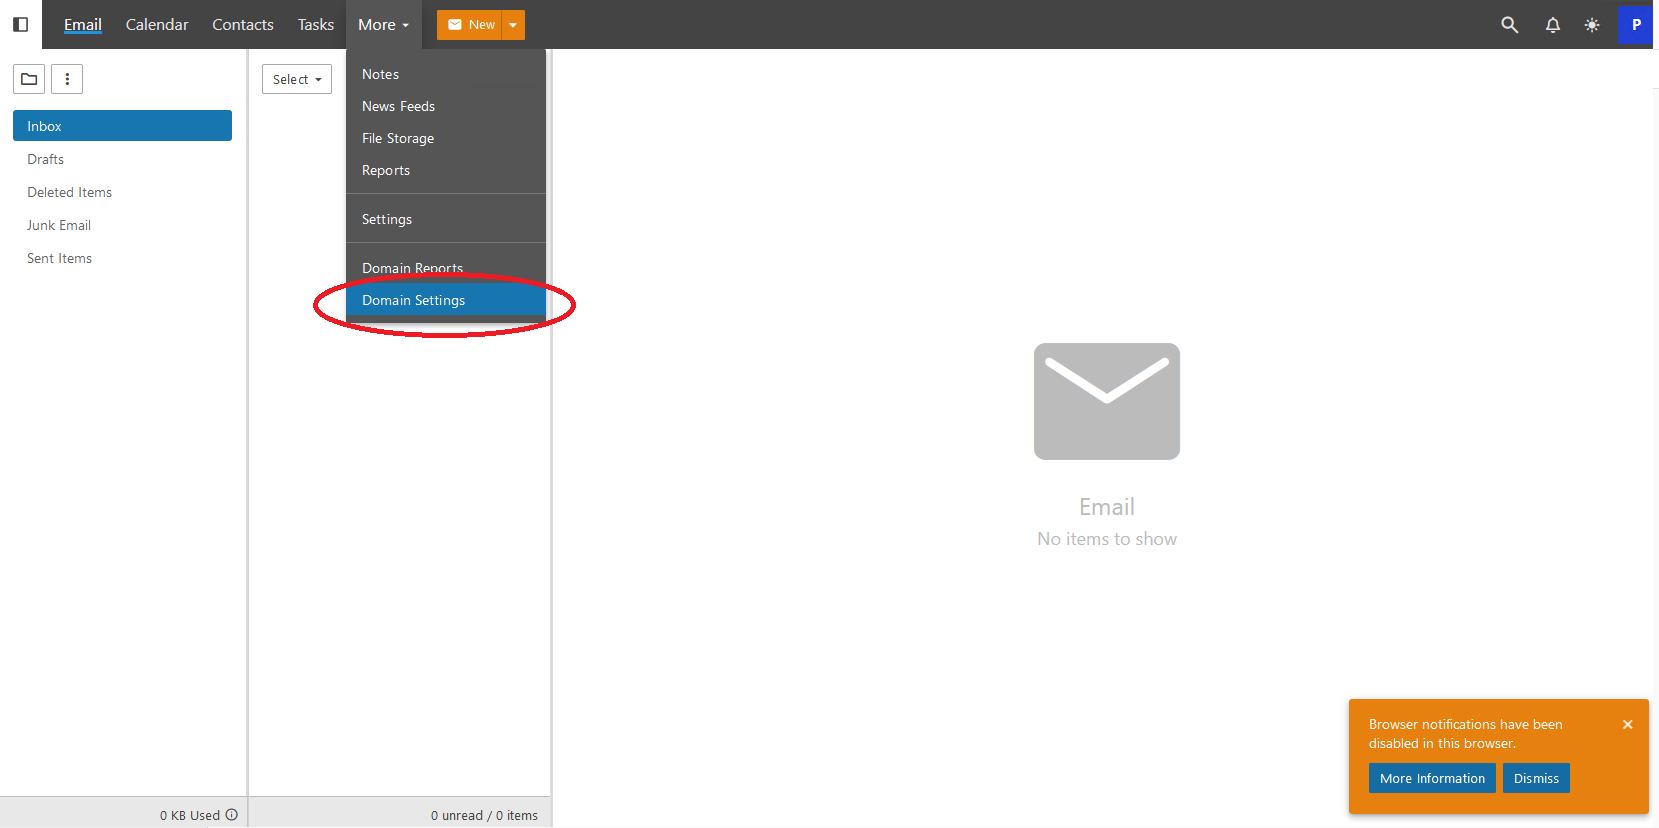
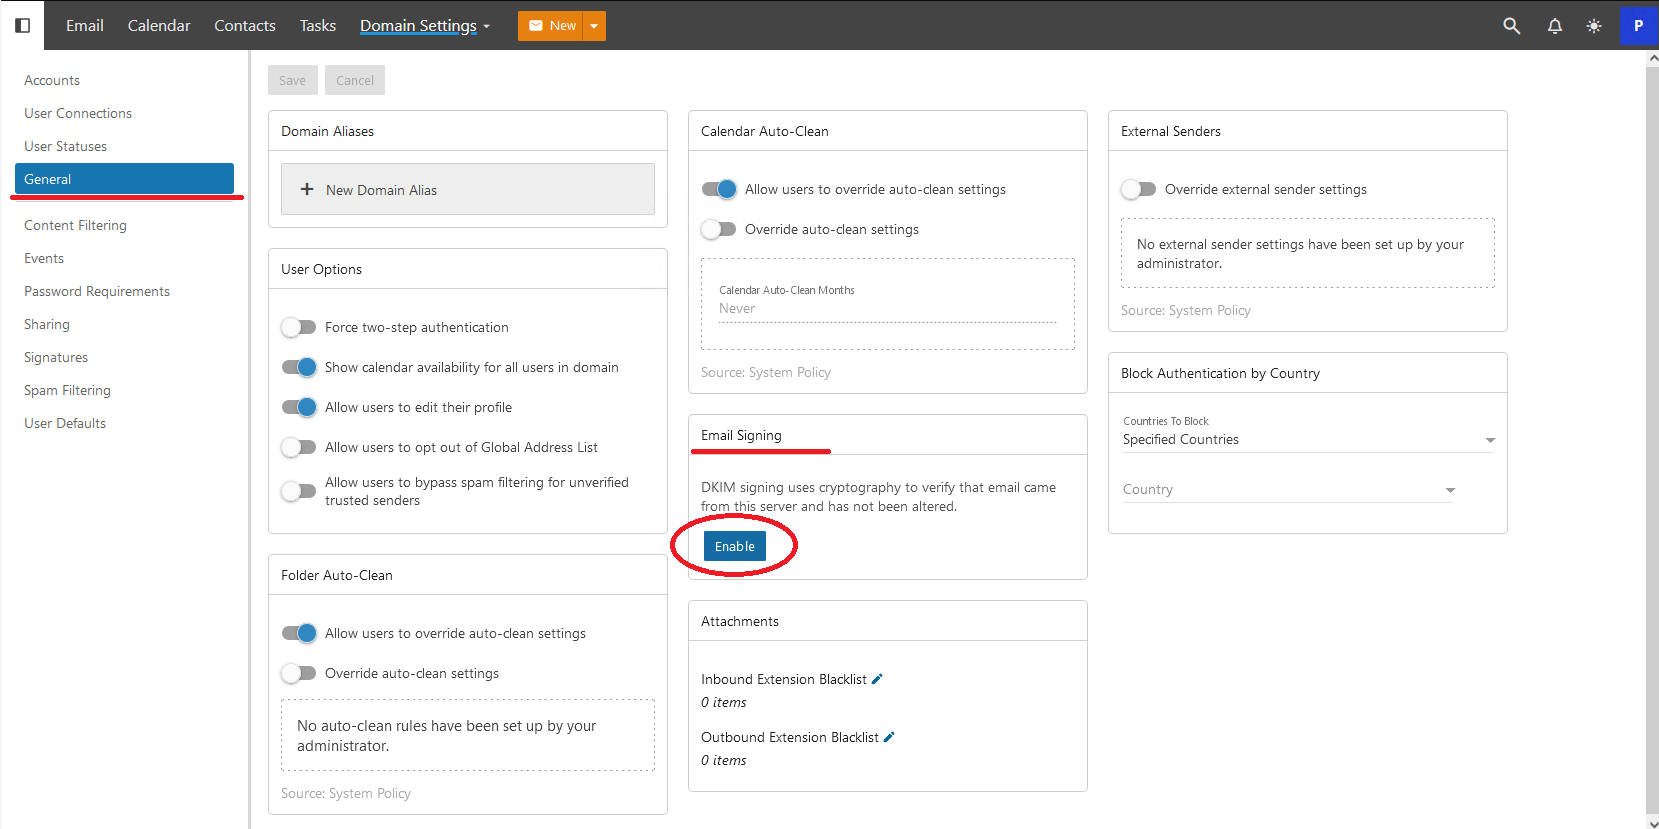
In the Domain Settings menu, click on GENERAL in the left menu.
-
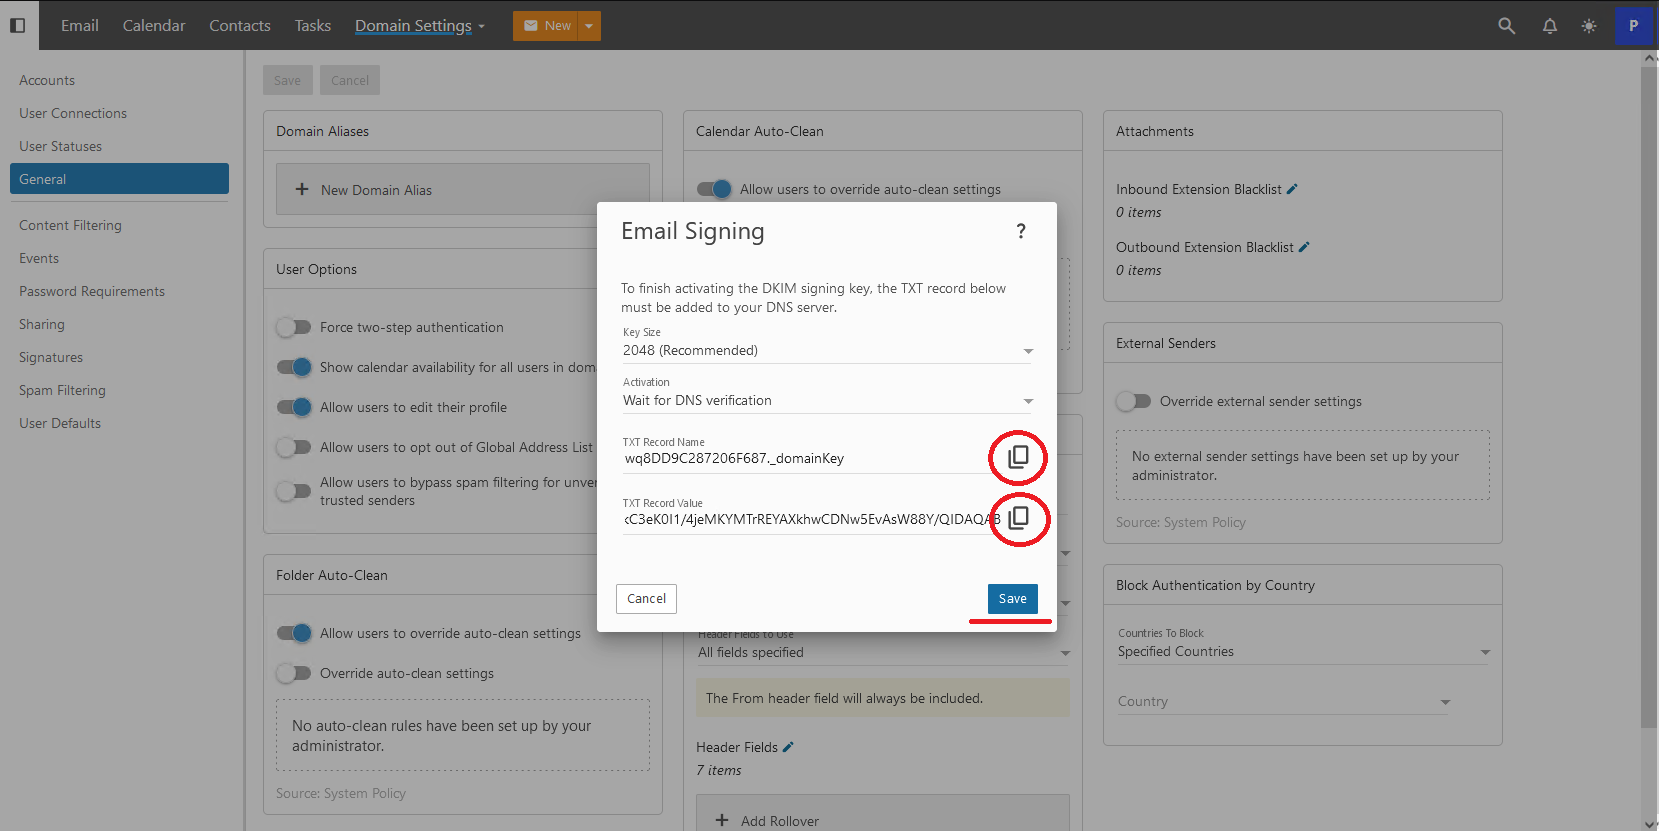
Now you can see the setting Email Signing – click the Enable button.
- Now you can see the generated TXT record, which needs to be added to your domain's DNS. By clicking the icons, you can easily copy the record and paste it into your domain's settings.
-
The record will look like this:
Name: wq8DD9C287206F687._domainKey Type: TXT Value: v=DKIM1; k=rsa; h=sha256; p=MIIBIjANBgkqhkiG9w0BAQEFAAOCAQ8AMIIBCgKCAQEAq0MzEKBCk+XrHsBtb+/FBUoU60Dt55dq2XnR+uwfcDLMJFp1lBusJ2OqEsjTH4nxByF10Glmw+d+t88ciHq38lLvUtpvc79CgeXzrizTGBF4+bNdt91qmTqL9MET/nvFr/GPXYEJzIh/XRJsqR4pBfOMTZHmQd/2MxNpLaCSecIe2FxpWSWBfAbki8v+I++HNvXZ0P3j06i3hILwScgdvNa4Ybd5y9pn85e++ldpRYks9/4OAXXK8a+jw+jaQeB/Rw3VVwNiCgglETqHNXQ6lB+p3/xaDt+A+QU65lIKmaS/QkC3eK0I1/4jeMKYMTrREYAXkhwCDNw5EvAsW88Y/QIDAQAB -
If you're using our DNS servers, go to Administration > DNS > yourdomain.com > Add Record and add the following DNS record:
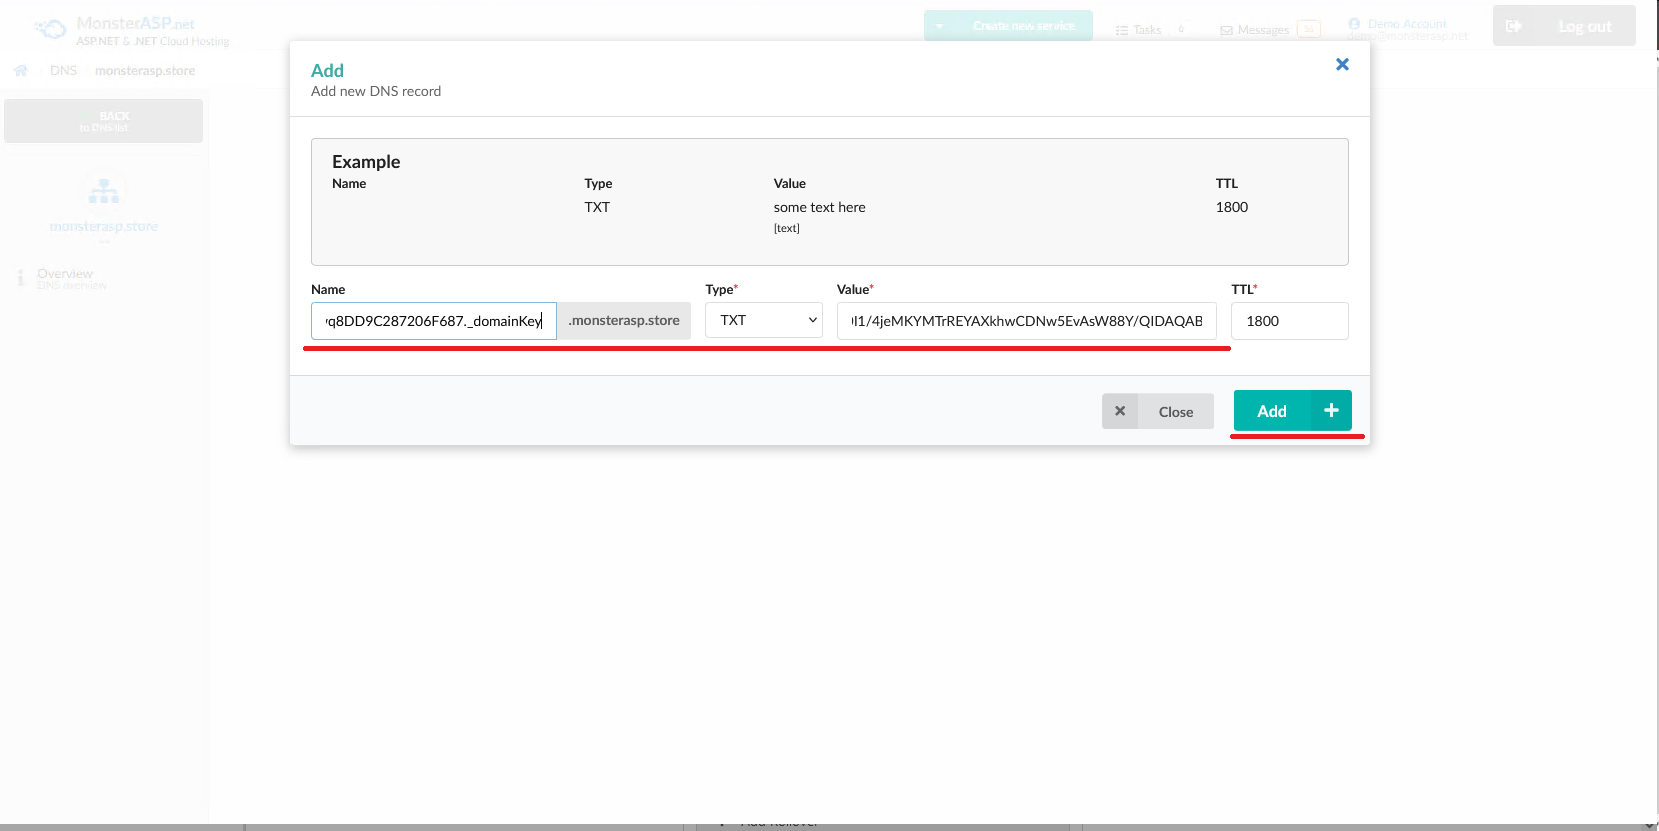
Done. Save the DKIM signature in Webmail, and after DNS replication, DKIM will be active.