How to deploy Website content from ZIP file
This article contains steps how to publish website content from ZIP file.
ASP.NET / .NET freehosting
If you don't already have our ASP.NET / .NET freehosting, sign up for FREE at https://MonsterASP.net/.
-
Initial Setup
Create a website from our hosting Control panel.
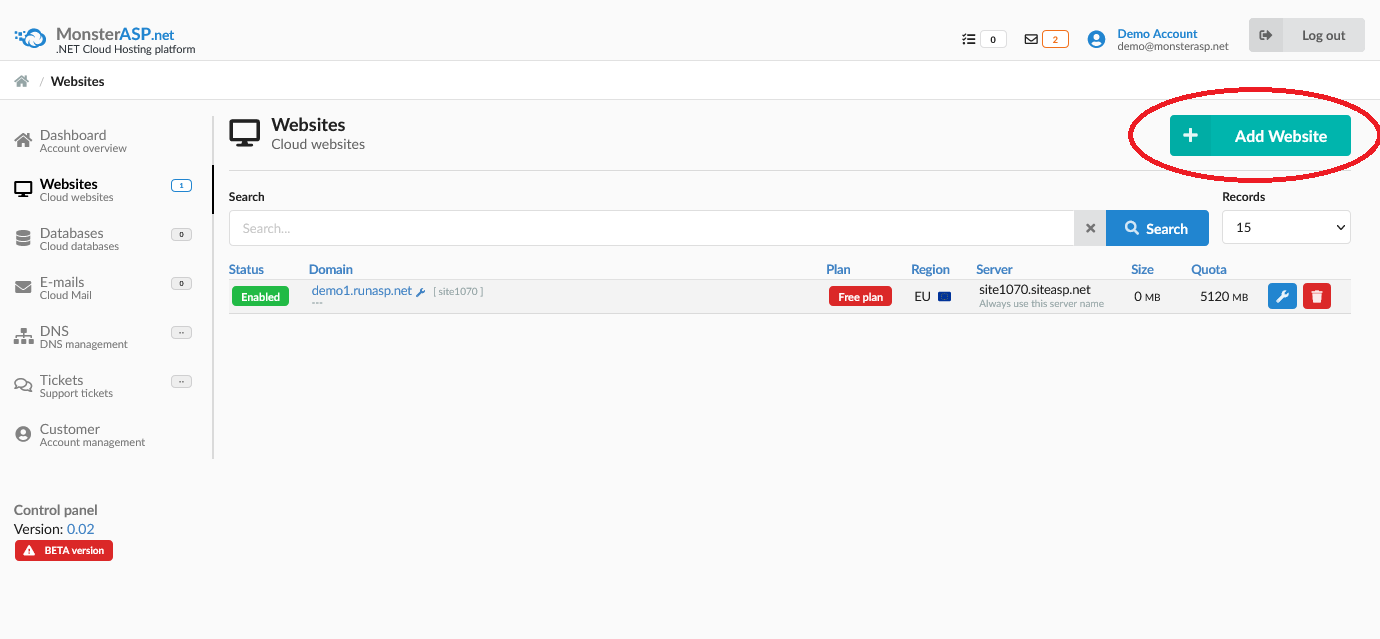
-
File Manager
In website details, in this case demo1.runasp.net, click on Files (File Manager) icon.
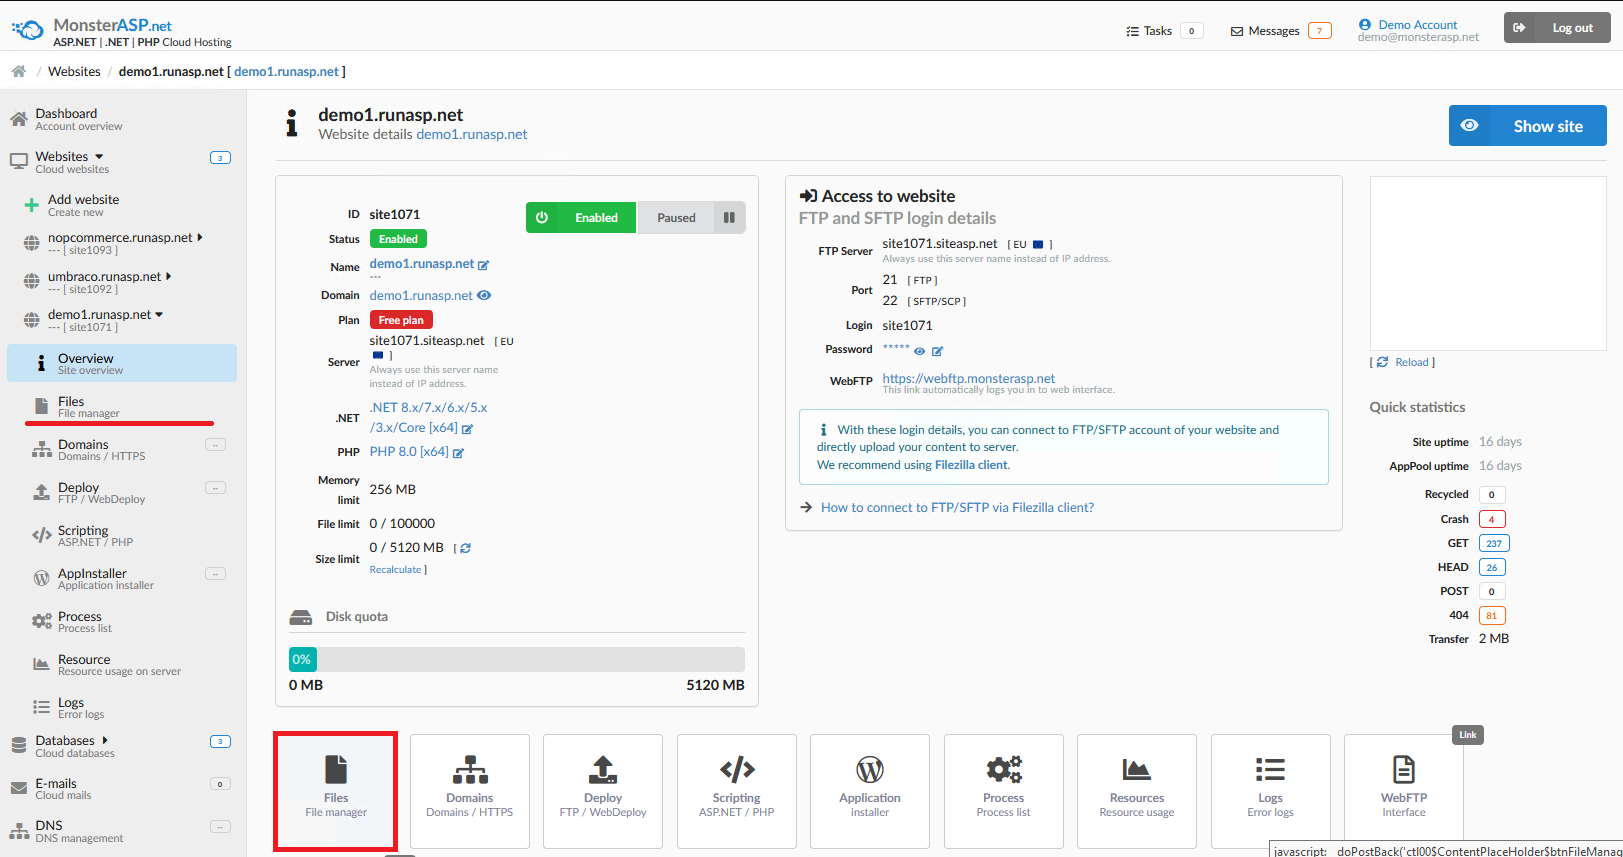
-
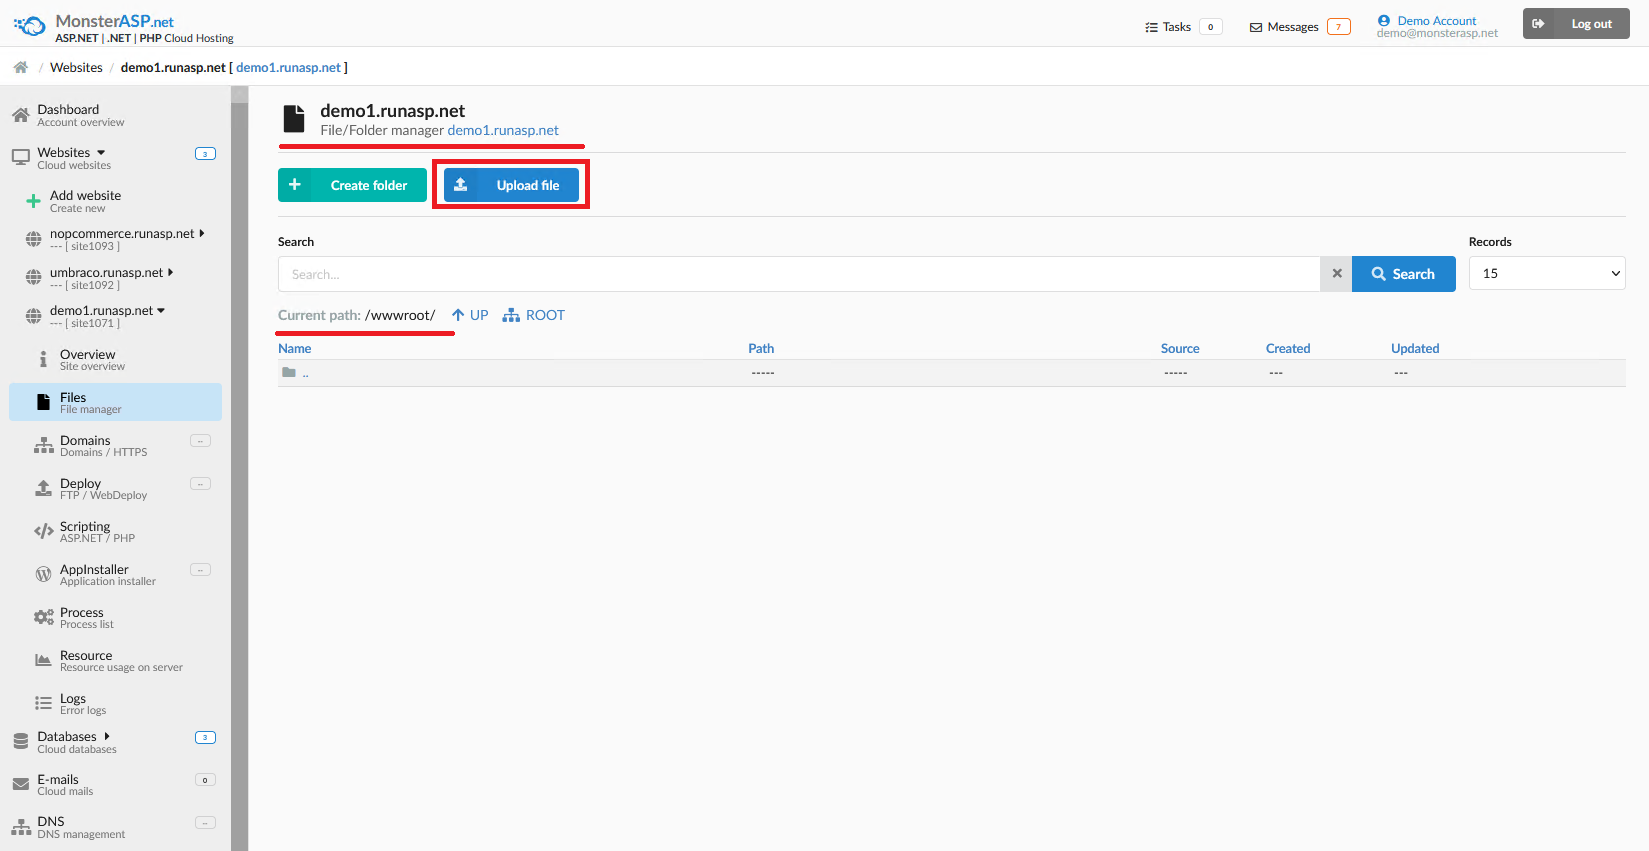
Upload File
Than you will see content of your Website. Now simple click on Upload file icon, locate your ZIP file on your PC and click on Upload button.
Folder \wwwroot is website root and all public Website files must be located in this directory.
-
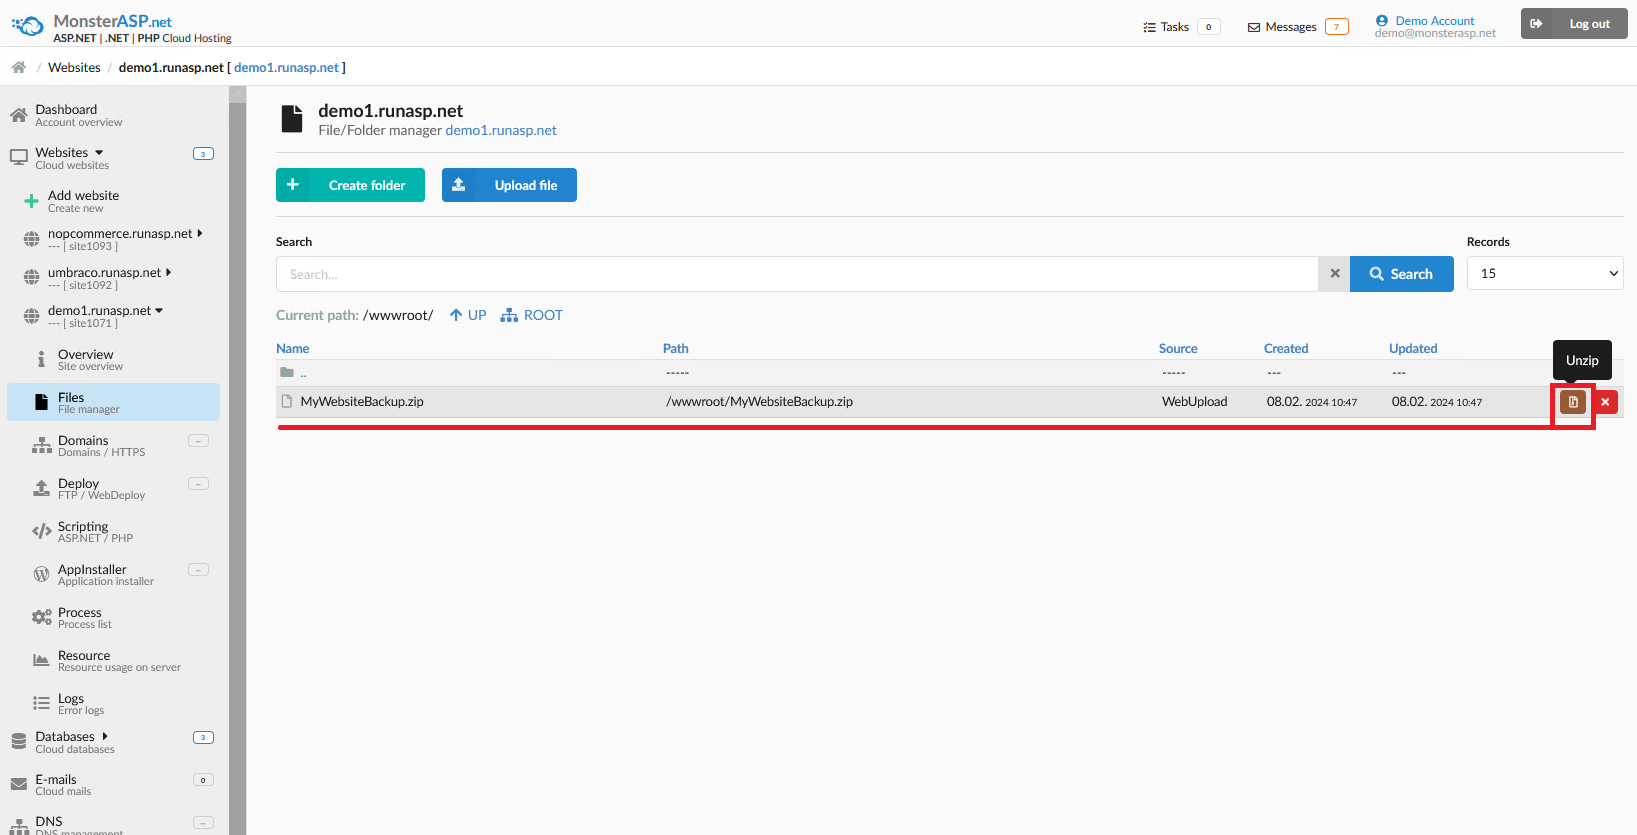
Unzip File
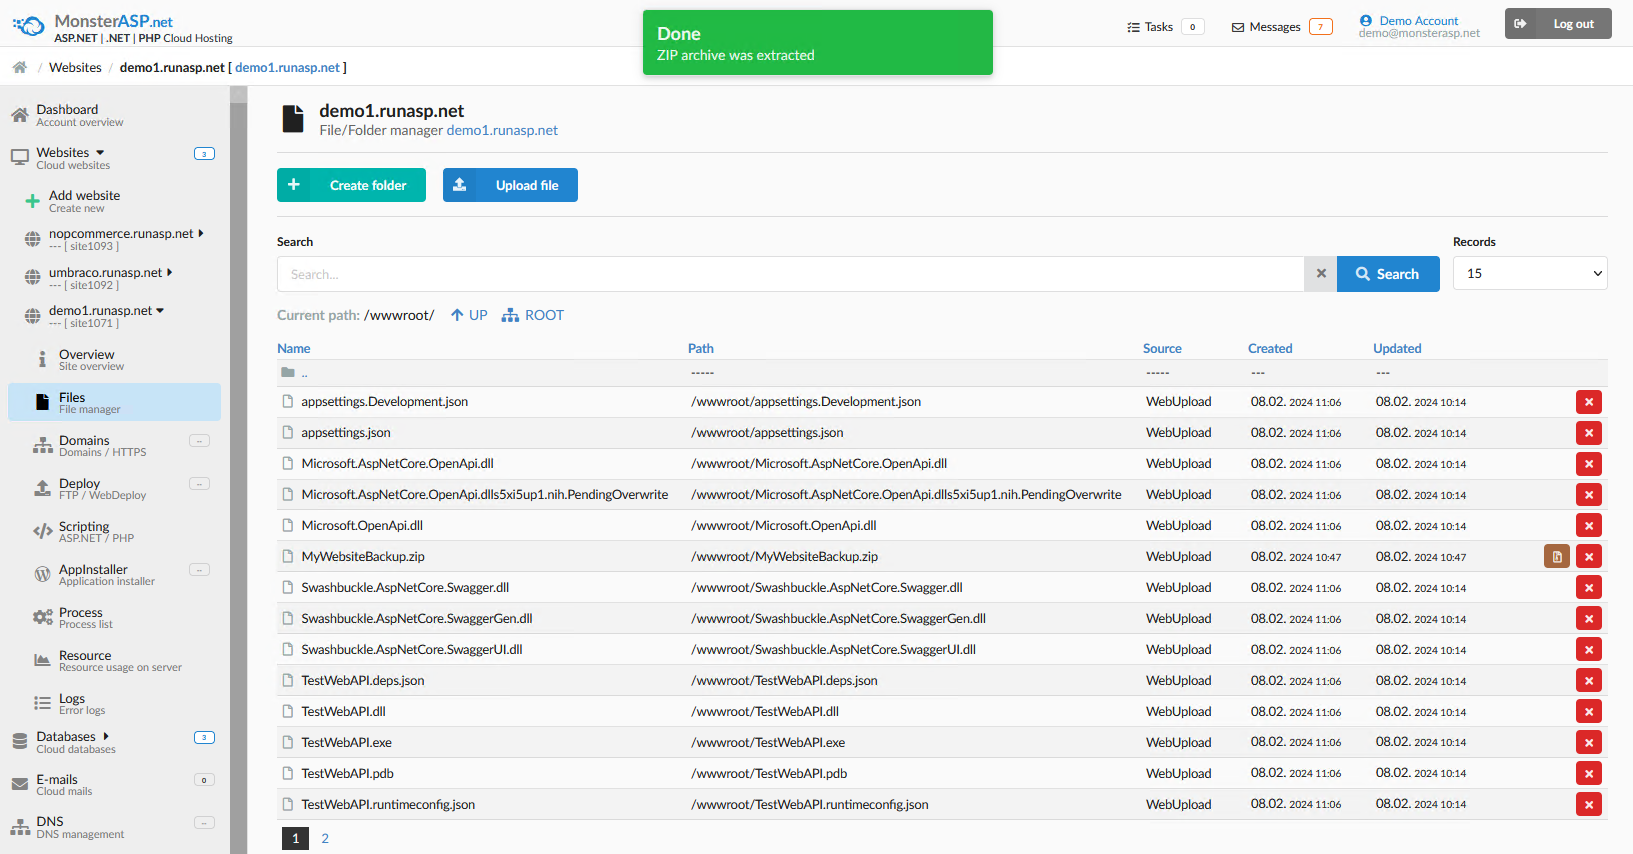
Now is your ZIP file successfully stored on your Website. All you need to do now is unzip file by clicking on Unzip icon.
-
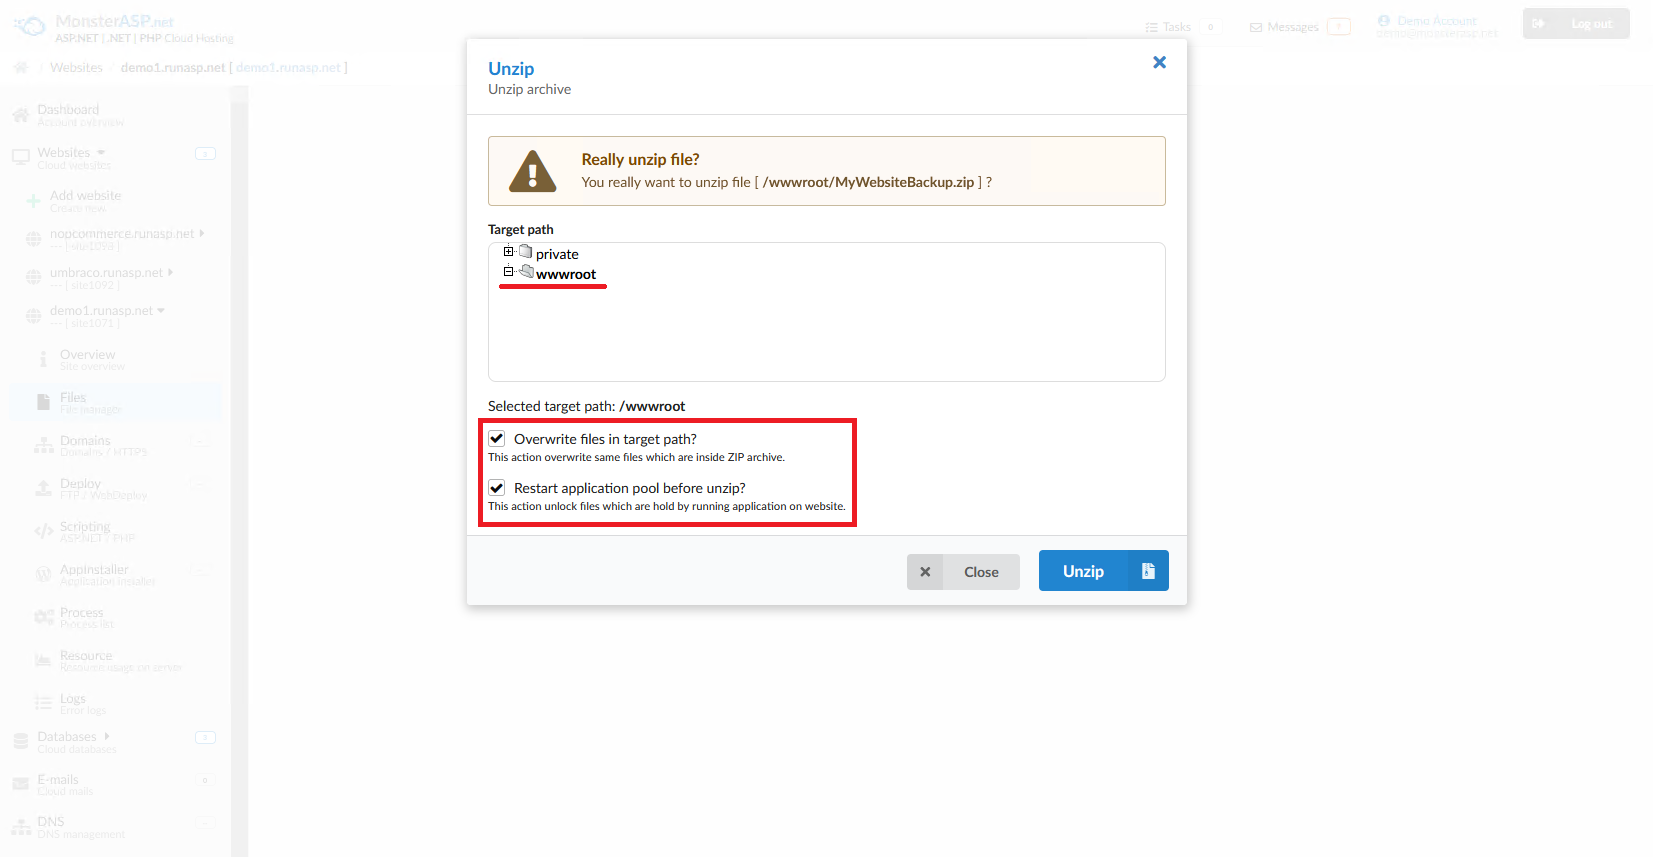
Unzip settings
In the last step, select where to extract content of your ZIP archive. Most often this is /wwwroot directory , which is the root of Website.
If you are overwriting existing application, you will need to select options Overwrite files in target path and Restart application pool before unzip. If your application is currently running, this is needed to overwrite locked/used files.
- Congratulations, it's done.