How to deploy Website content via FTP/SFTP
This article contains steps how to deploy your Website content using FTP/SFTP access.
ASP.NET / .NET freehosting
If you don't already have our ASP.NET / .NET freehosting, sign up for FREE at https://MonsterASP.net/.
- Initial Setup
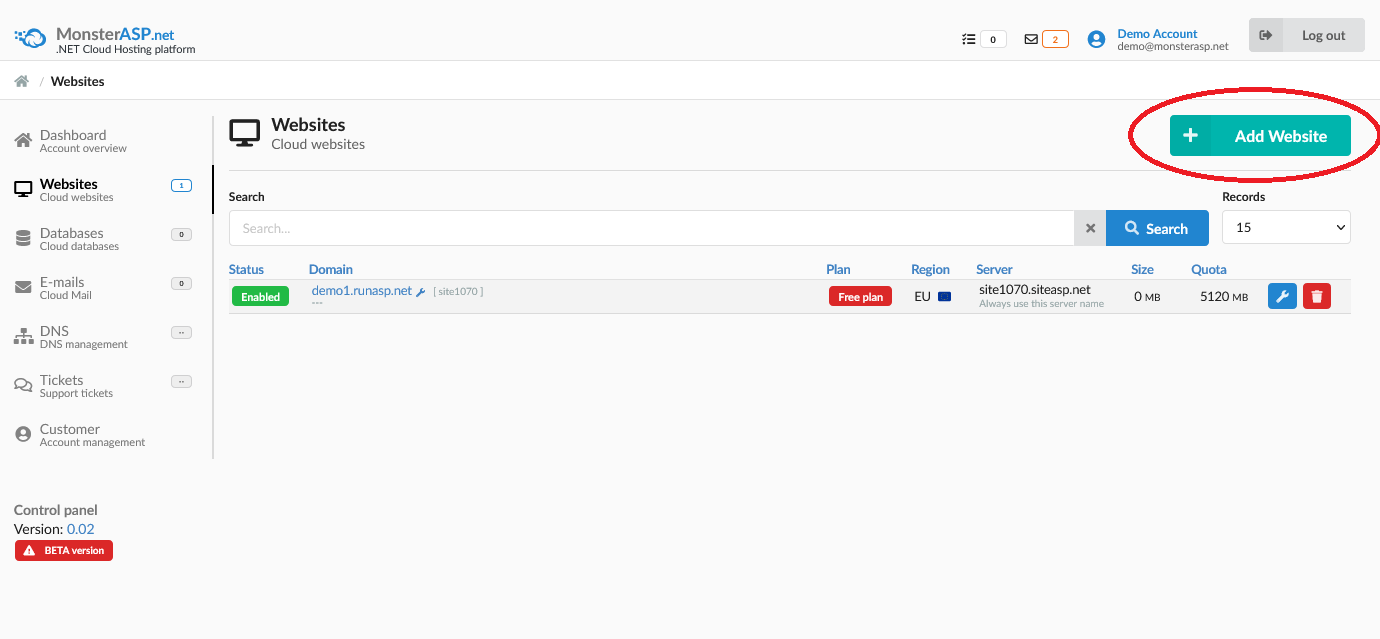
Create a website from our hosting Control panel.
-
Install FileZilla Client
If you haven't already, download and install FileZilla Client from official website: https://filezilla-project.org/
-
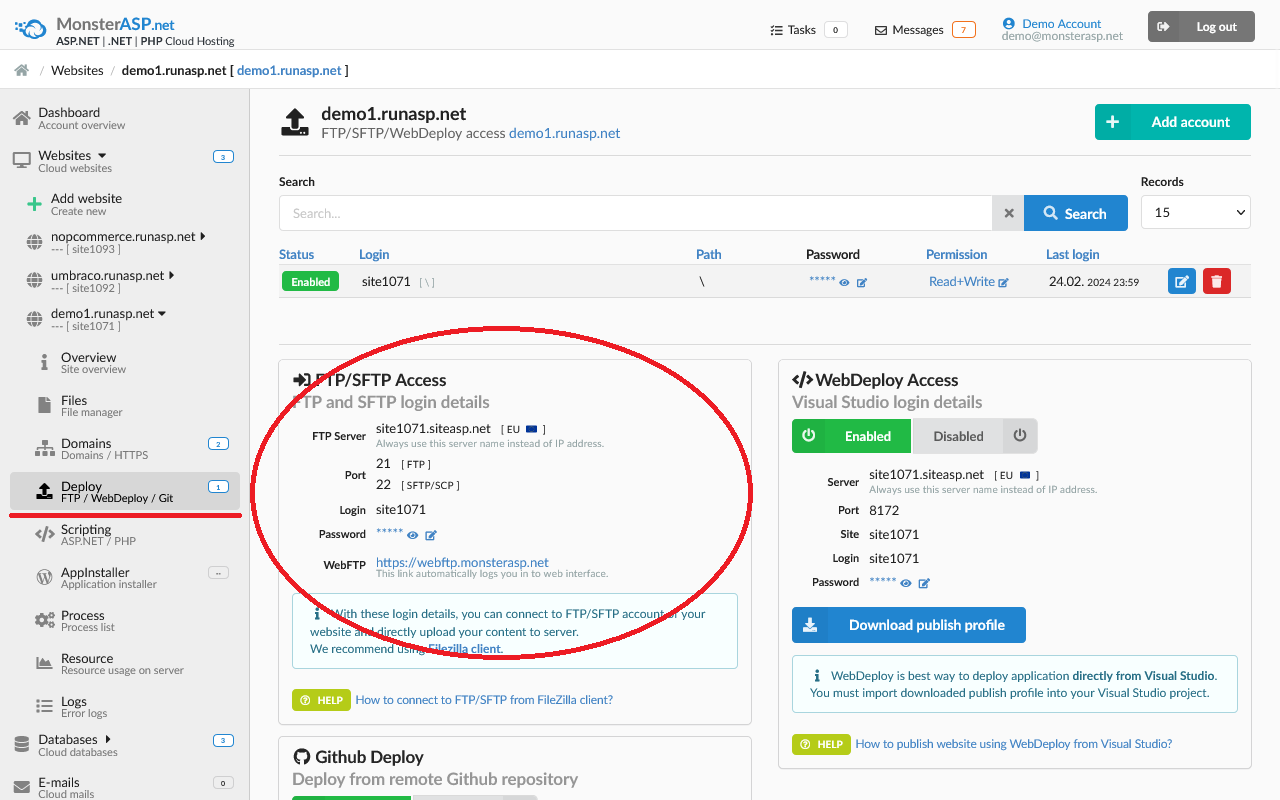
Obtain FTP/SFTP credentials
On left menu select Deploy (FTP/WebDeploy/Git) and you will see Website FTP/SFTP access details.
- FileZilla Client
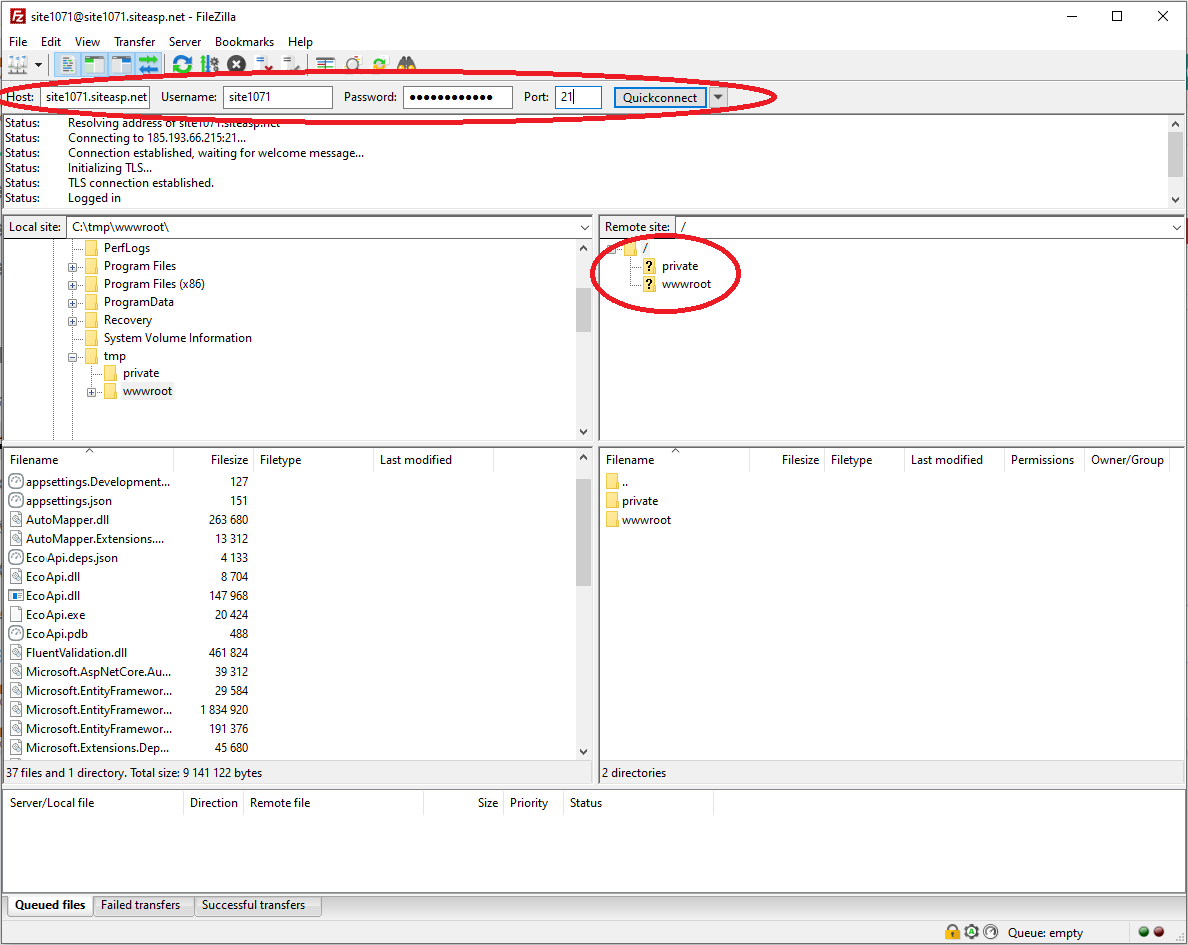
Start FileZilla FTP client and on Top please fill all fields and click Quickconnect.
- Host = siteXXX.siteasp.net
- Username = siteXXX
- Password = *****
- Port = 21
Once you are connected, you'll see two panes. Left panel displays your local files and right panel shows Website content on server.
- Upload you Application Files
In left panel navigate to directory where your application files are stored on your local computer.
- Select files and folders from left panel that you want to upload to the server
- Drag and drop them into right panel ( website root directory \wwwroot ). FileZilla will begin transferring files to our server.
Folder \wwwroot is website root and all application files what can be accessible through web browser must be located in this directory.
Debug: What should I do if the files on FTP can’t be overwritten?
When you upload files to the FTP (for example, when deploying a new version of a website), you may see that some files cannot be replaced or deleted.
Typical FTP error messages:
"550 Cannot delete file – file in use"
"Permission denied / file locked"
Reason:
The files are locked by the web server (IIS) — the website is currently using them, so they cannot be changed.
Solutions:
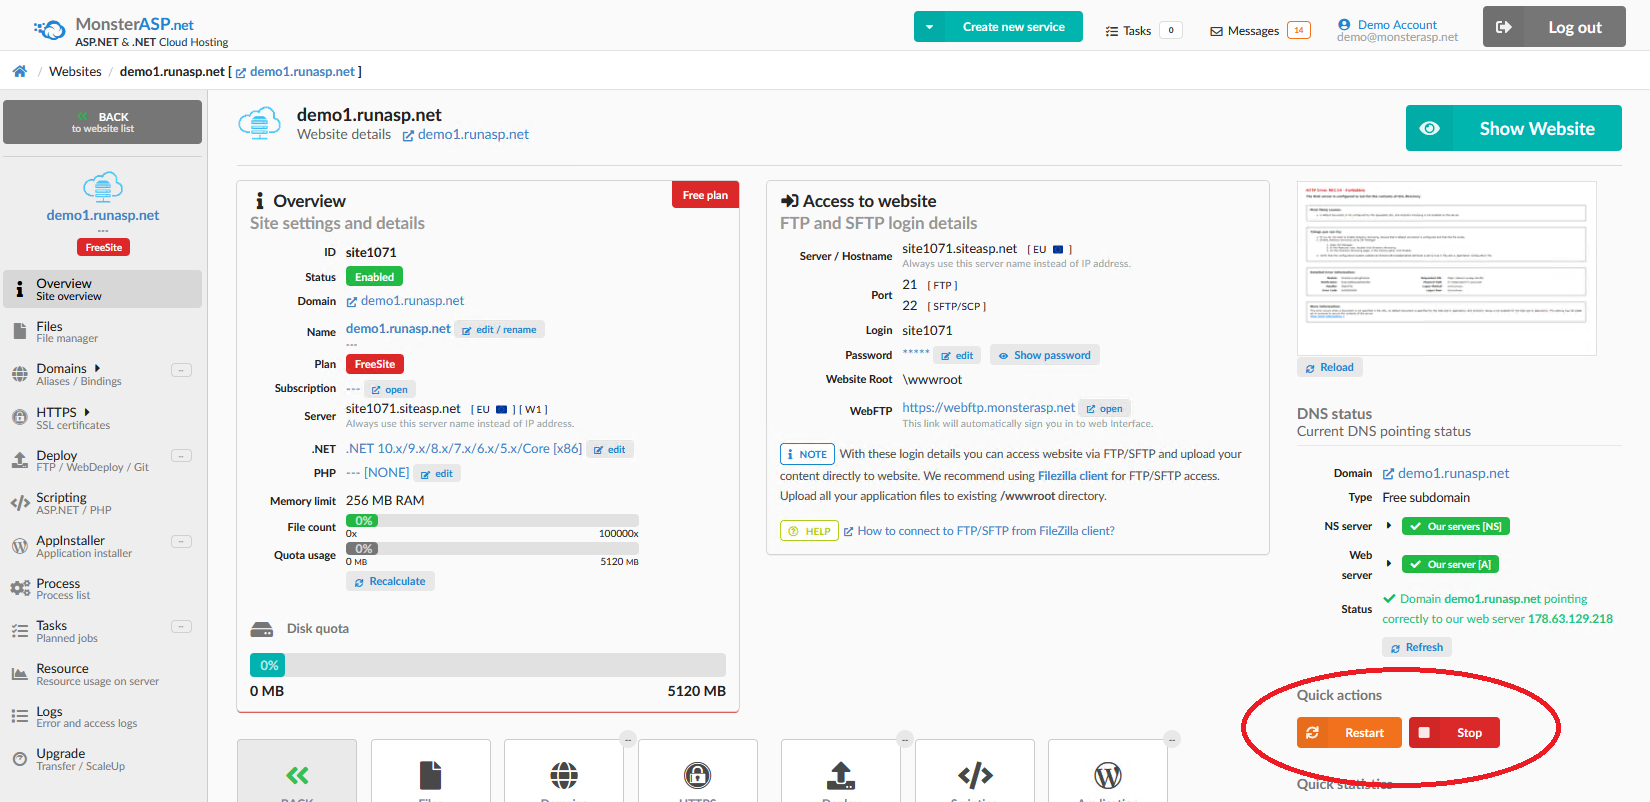
Option 1: Go to: Control Panel → Websites → [your website name] / Overview / Click Restart (or Stop if needed) and than try uploading your files again through FTP.
Option 2: Upload a file named app_offline.htm to the root folder of the website. IIS will automatically stop the website More information about app_offline.htm file here: App Offline file app_offline.htm