Namecheap: DNS settings
This article contains steps how to connect your own domain in Namecheap.com with our hosting services.
ASP.NET / .NET 8 / .NET 9 Freehosting
If you don't already have our ASP.NET / .NET Core Freehosting, sign up for FREE at https://MonsterASP.net/.
Description
You have already registered your domain with Namecheap and would like to connect it to our hosting services. To do this you need to configure DNS servers for your domain. DNS settings can be managed in Namecheap Control Panel.
Control panel - Namecheap.com
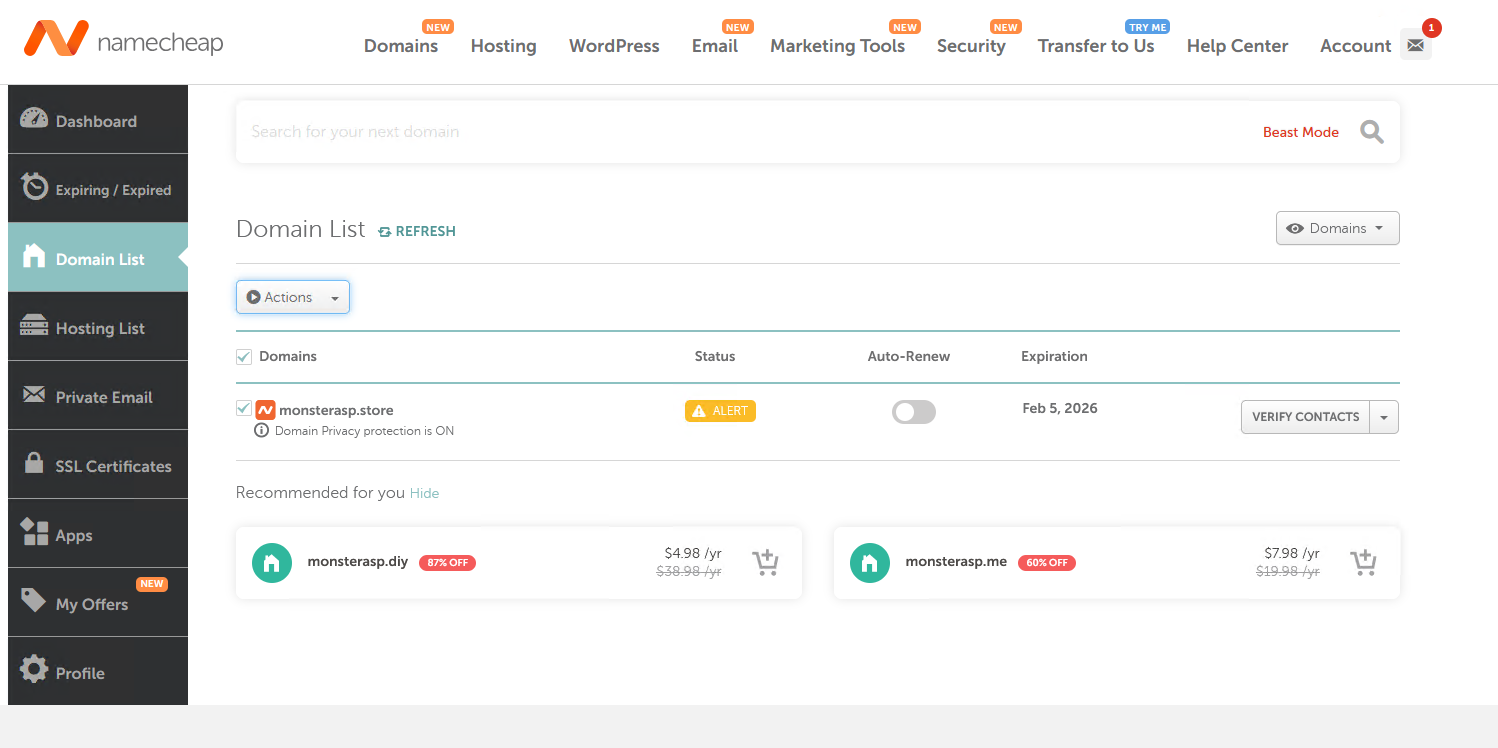
1) Log in to your Namecheap
Login to your Namecheap account and go to your domain list.
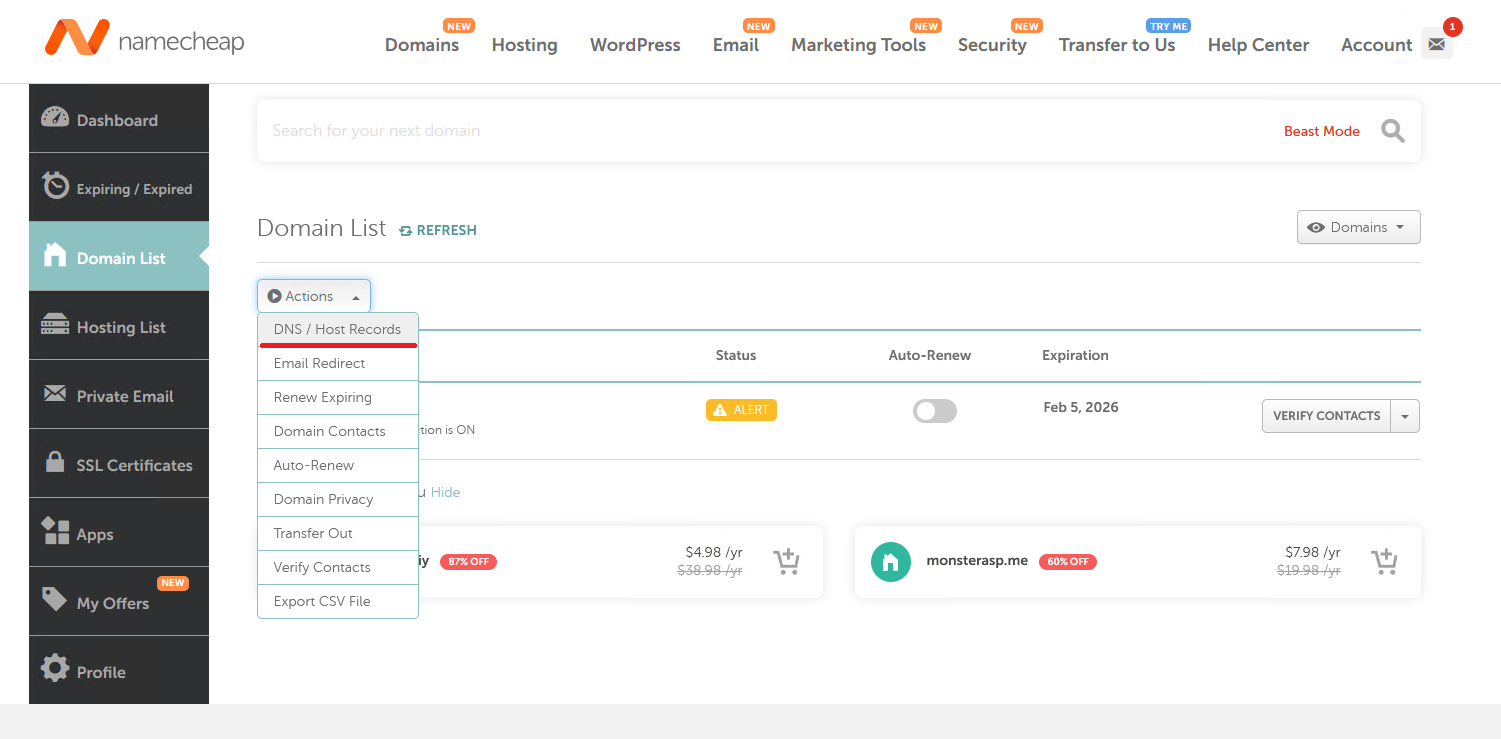
2) Manage DNS / Host Records
Select your domain and click on Actions button and choose DNS / Host Records.
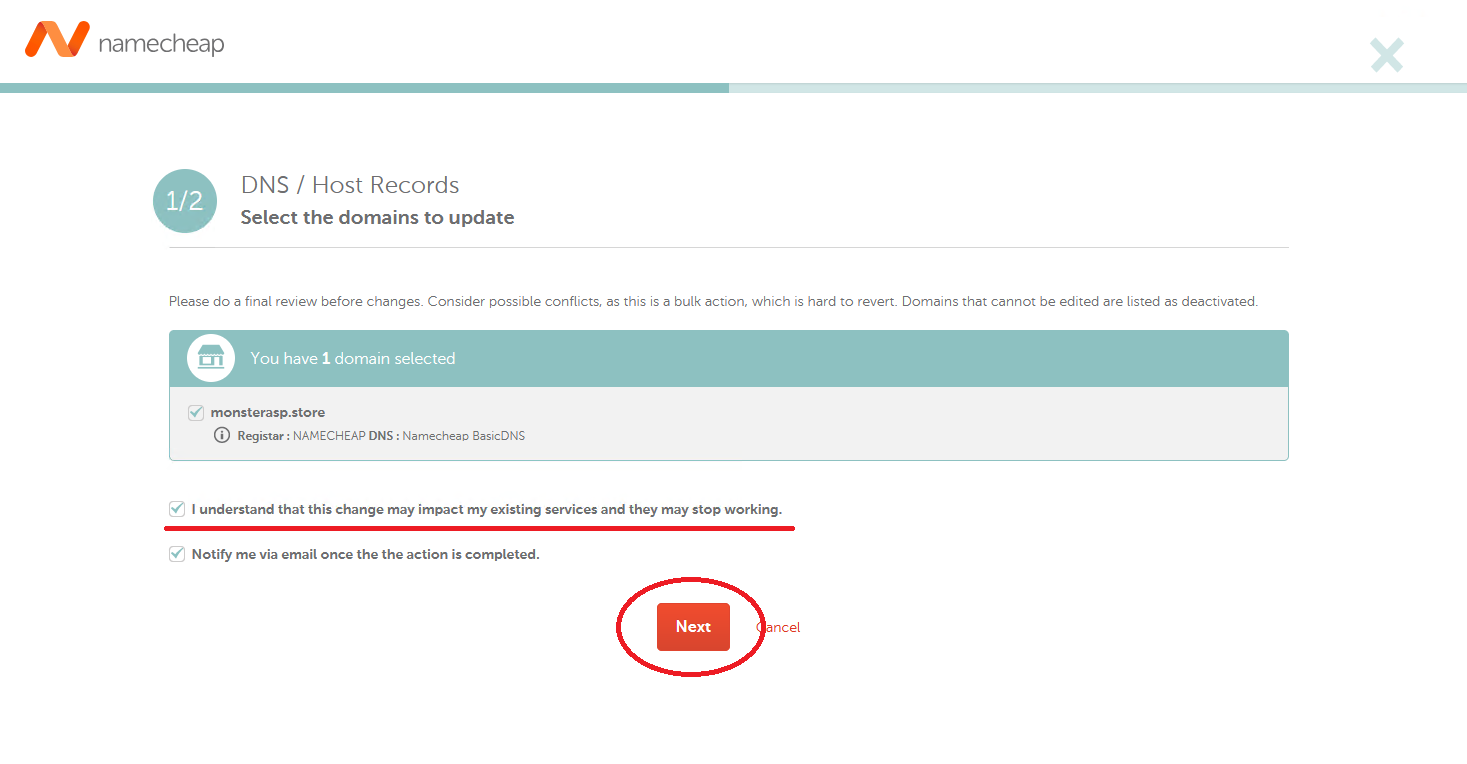
3) Confirm you want to setup domain DNS
In next step you need to select I understand that this change may impact my existing services and they may stop working.
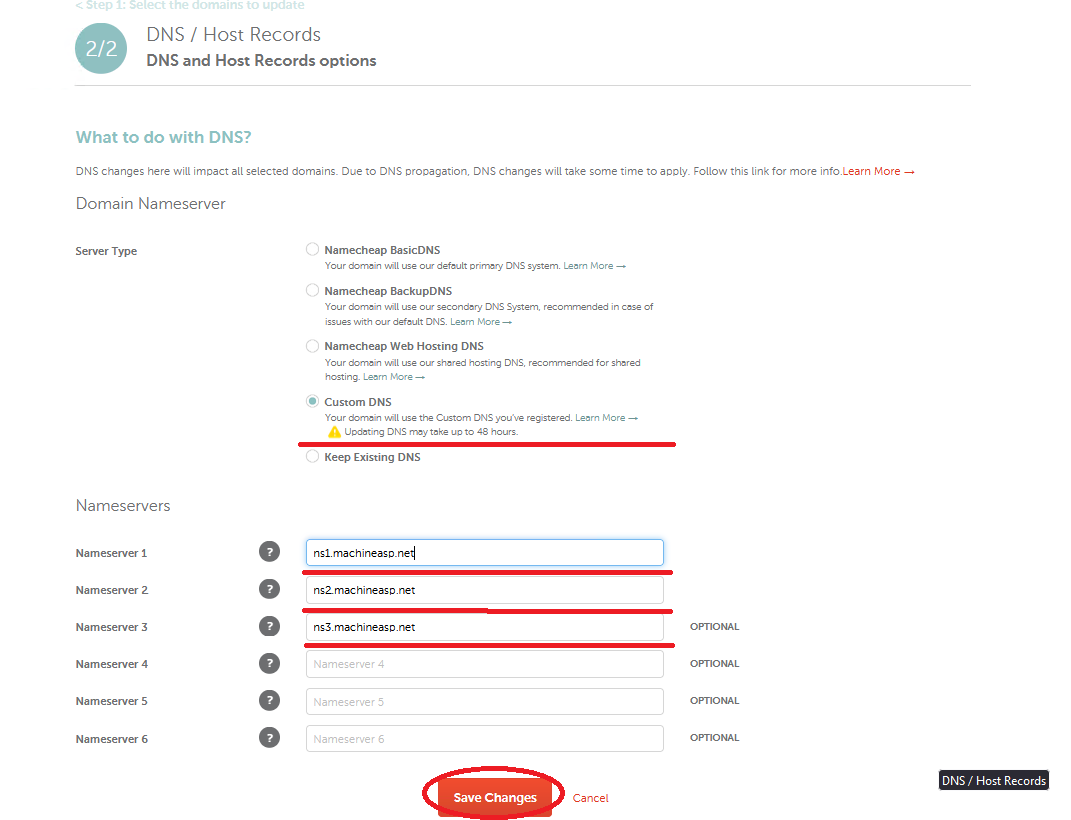
4) Setup Custom DNS servers
In next step we will setup DNS servers to MonsterASP.NET which connect your new domain with our hosting services.
Click on CUSTOM DNS. Than We set the following DNS servers:
ns1.machineasp.net
ns2.machineasp.net
ns3.machineasp.net
5) Done: Wait for DNS propagation
Your DNS settings have been successfully updated.
Now you just need to wait for the changes to propagate across internet.
This process usually takes between few minutes to two hours, but in some cases it can take up to 24 hours.