Cloudflare
This article contains steps how to activate free Cloudflare for your own domain.
ASP.NET / .NET 8 / .NET 9 Freehosting
If you don't already have our ASP.NET / .NET Core Freehosting, sign up for FREE at https://MonsterASP.net/.
1. Sign up and Add Your Website to Cloudflare
-
Go to https://cloudflare.com
-
Sign up for a free account.
-
After logging in, select “Enter an existing domain”.
-
Enter your domain name: yourdomain.com
-
Select: "Quick scan for DNS records". Cloudflare will scan your current DNS records.
-
Click “Continue”.
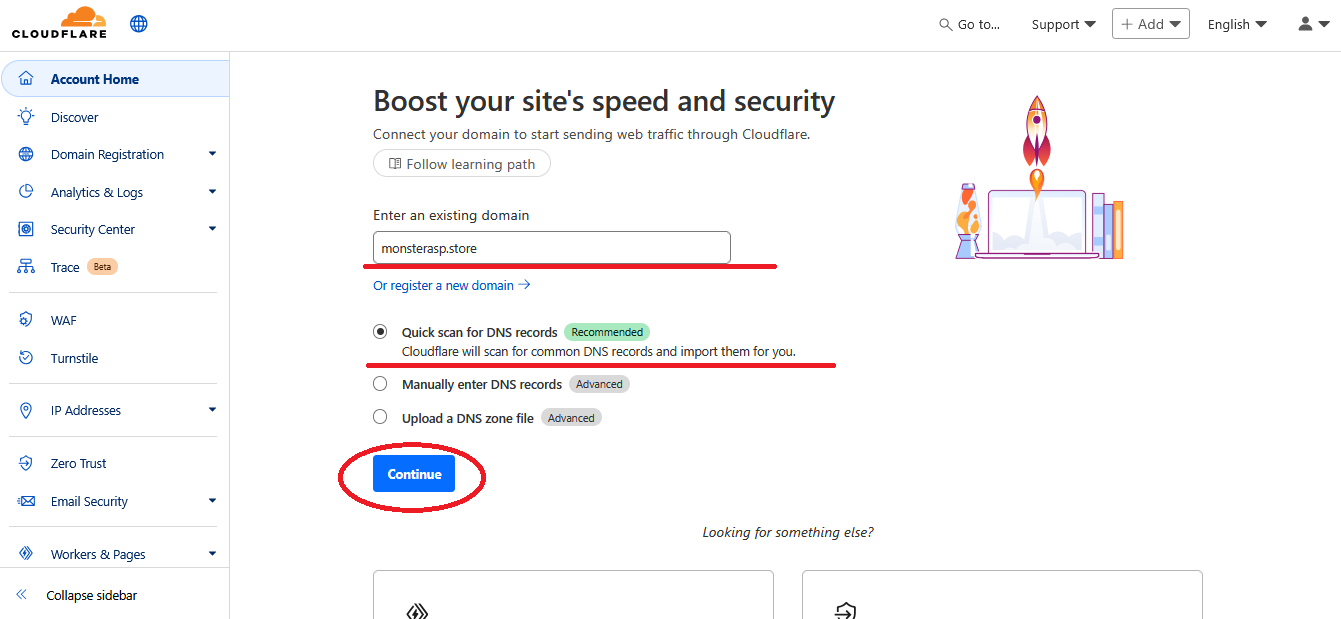
Choose the Free plan unless you need premium features.

2. Scan DNS and Update Nameservers
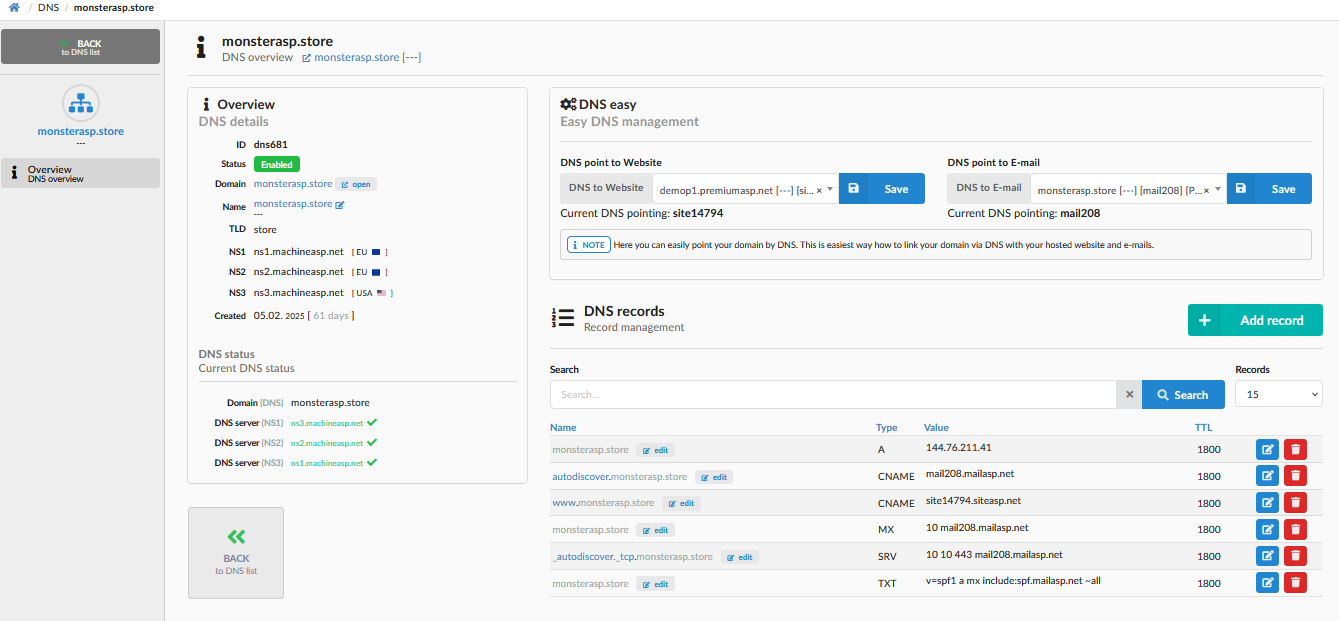
- Confirm that all your existing records (A, CNAME, MX, etc.) are correct.
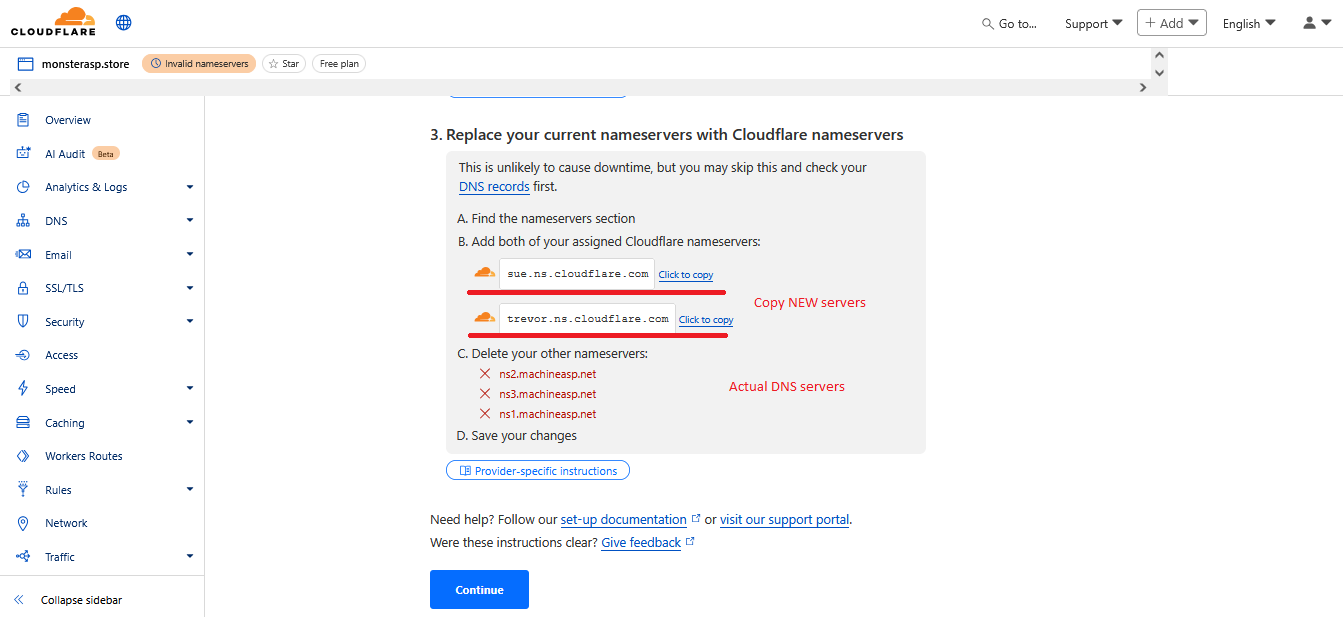
- Cloudflare will provide two nameservers (e.g., abby.ns.cloudflare.com, ivan.ns.cloudflare.com).

If you are using our DNS servers, you can compare DNS setting with DNS zone in MonsterASP administration
3. Update your nameservers to activate Cloudflare
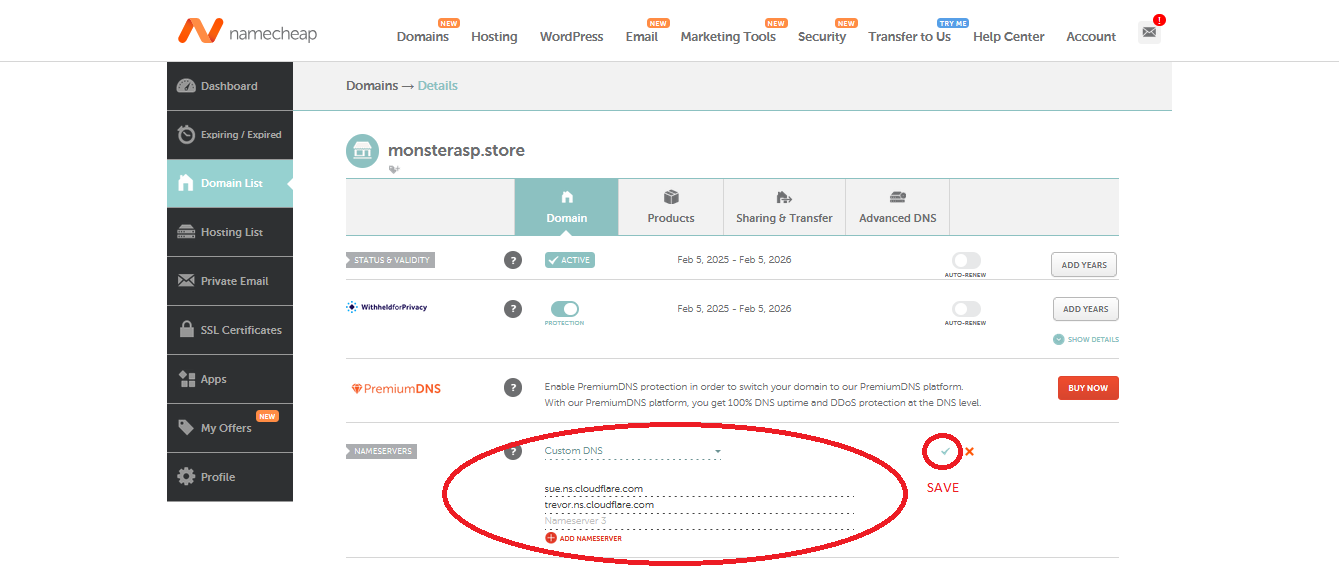
- Go to your domain registrar (where you bought your domain) and update the nameservers to Cloudflare’s. This change may take up to 24 hours but usually happens faster.
If you are using Namecheap for domain registration, here you can change DNS servers from ours(MonsterASP) to Clouflare:
4. Enable SSL/HTTPS on Cloudflare
-
In Cloudflare dashboard, go to the domain (yourdomain.com) settings.
-
Navigate to the “SSL/TLS” tab.
-
Set SSL mode to “Full” (Recommended) or “Full (Strict)” if your server has a valid certificate.
-
Activate SSL for your domain in MonsterASP administration HTTPS

Done. Now you are using Cloudflare DNS.