Namecheap: Domain registration
This article contains steps how to register your own domain with Namecheap.com
ASP.NET / .NET 8 / .NET 9 Freehosting
If you don't already have our ASP.NET / .NET Core Freehosting, sign up for FREE at https://MonsterASP.net/.
Domain registrar
We would like to inform you that we do not offer domain registration services, as we are not a domain registrar. However, we can recommend using a service like Namecheap.com for easy domain registration.
How to Register a Second-Level Domain on Namecheap.com
Follow these steps to register your own second-level domain on Namecheap.com:
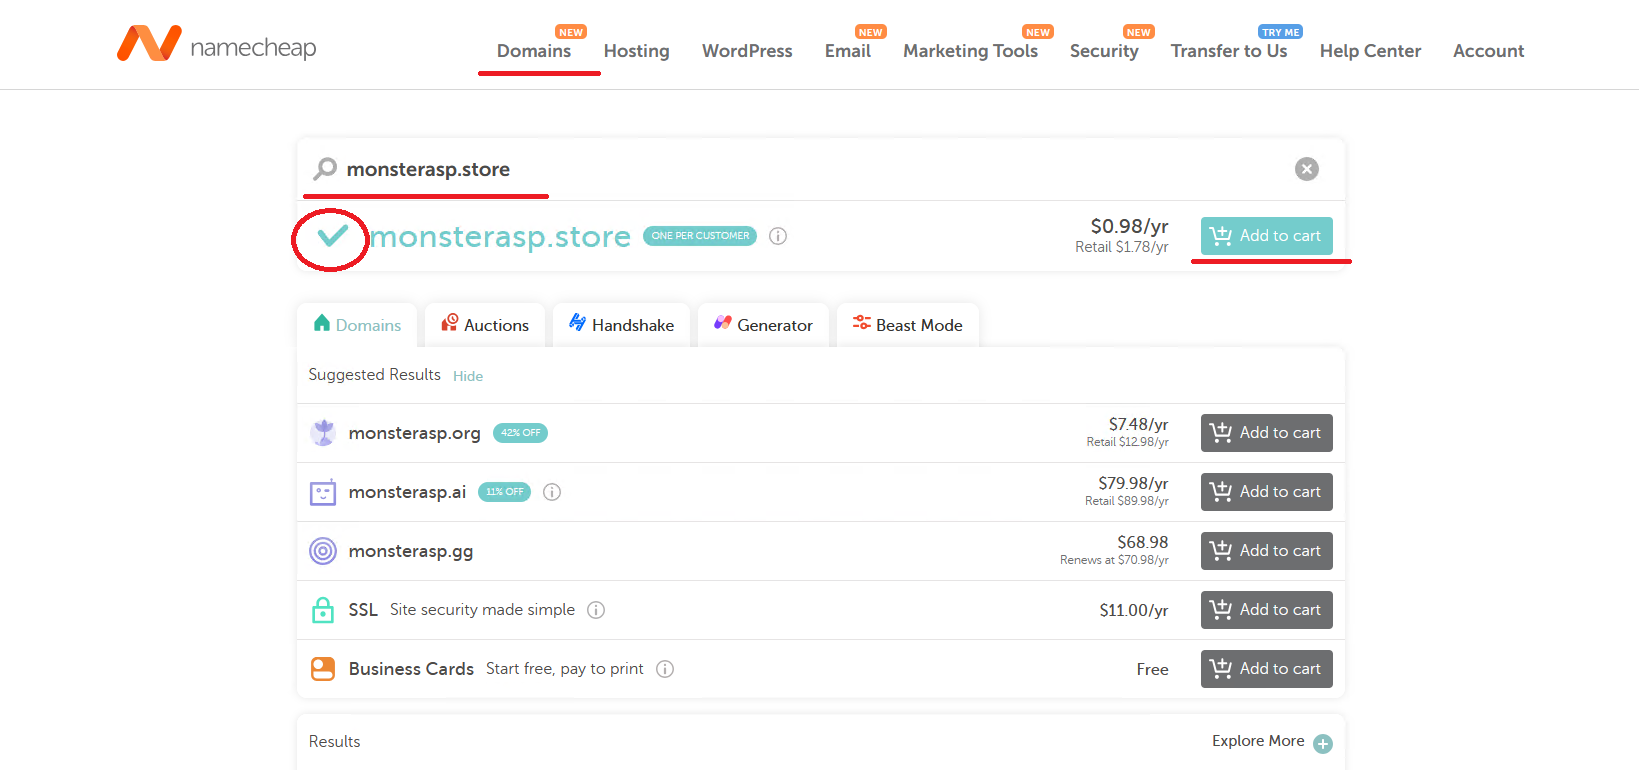
1. Search for Domain Availability:
- Go to Namecheap.com.
- Enter the desired domain name in the search bar and click the search button.
- The system will display the availability of your chosen domain and offer alternative options if it’s already taken.
- If the domain is available, click on the "Add to Cart" button next to it.
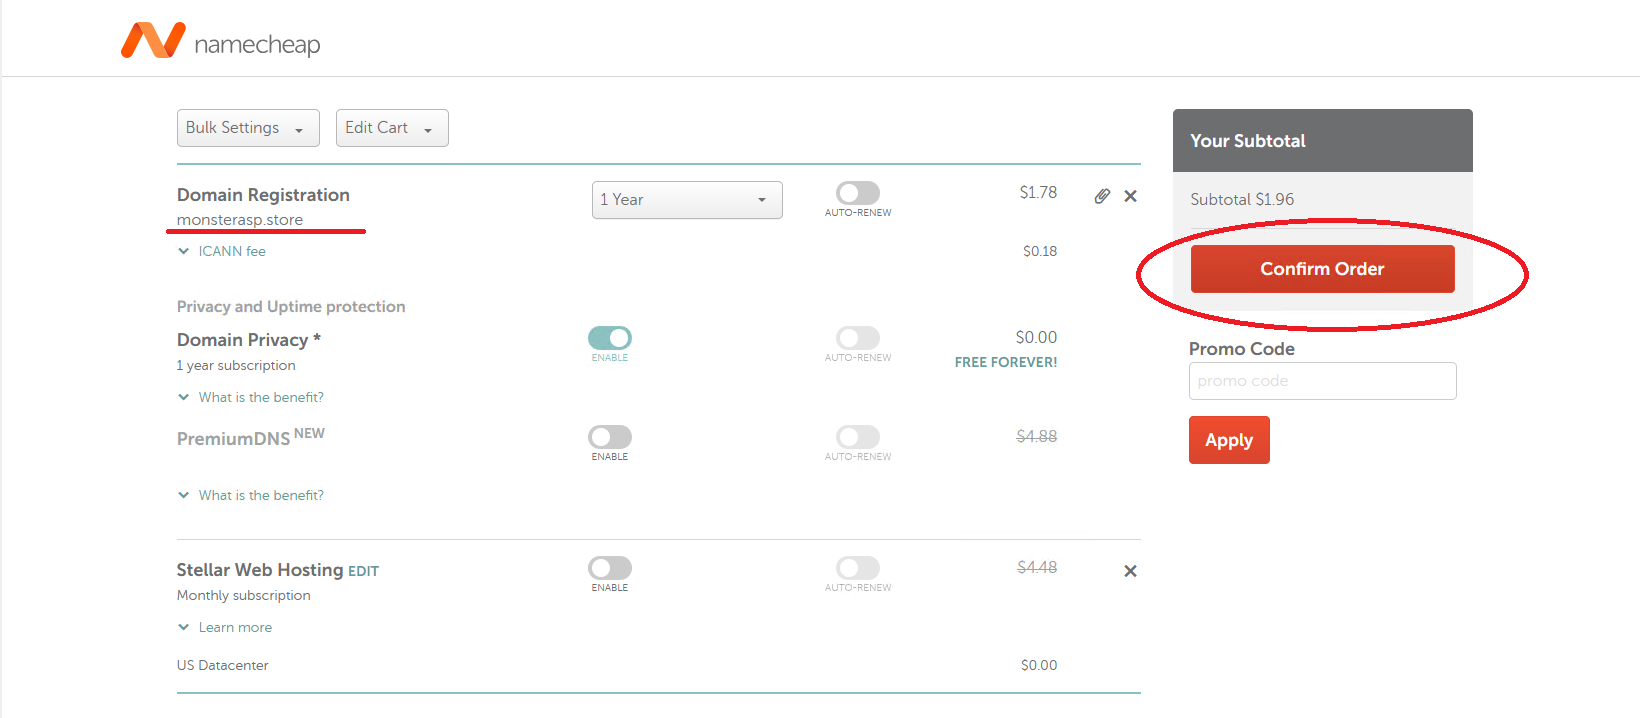
2. Configure the Domain:
- After adding the domain to your cart, you’ll have the option to set up additional services, such as WHOIS privacy protection to keep your personal details private.
- You can also select the registration period (e.g., 1 year, 2 years, etc.).
3. Create an Account or Log In:
- If you don’t already have an account with Namecheap, you’ll be prompted to create one.
- If you already have an account, log in with your credentials.

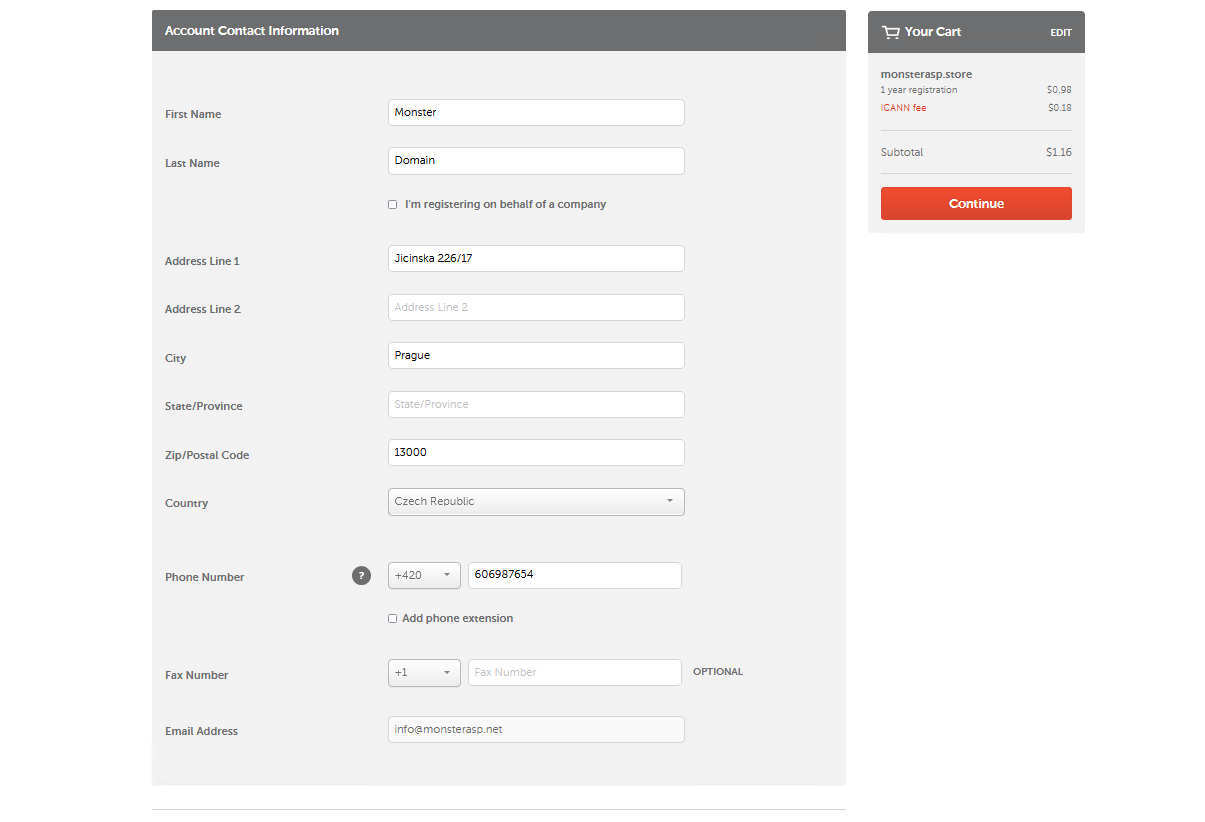
4. Enter Contact Information:
- Fill in the required contact information, which will be used for the domain registration. This includes your name, address, email, and phone number.
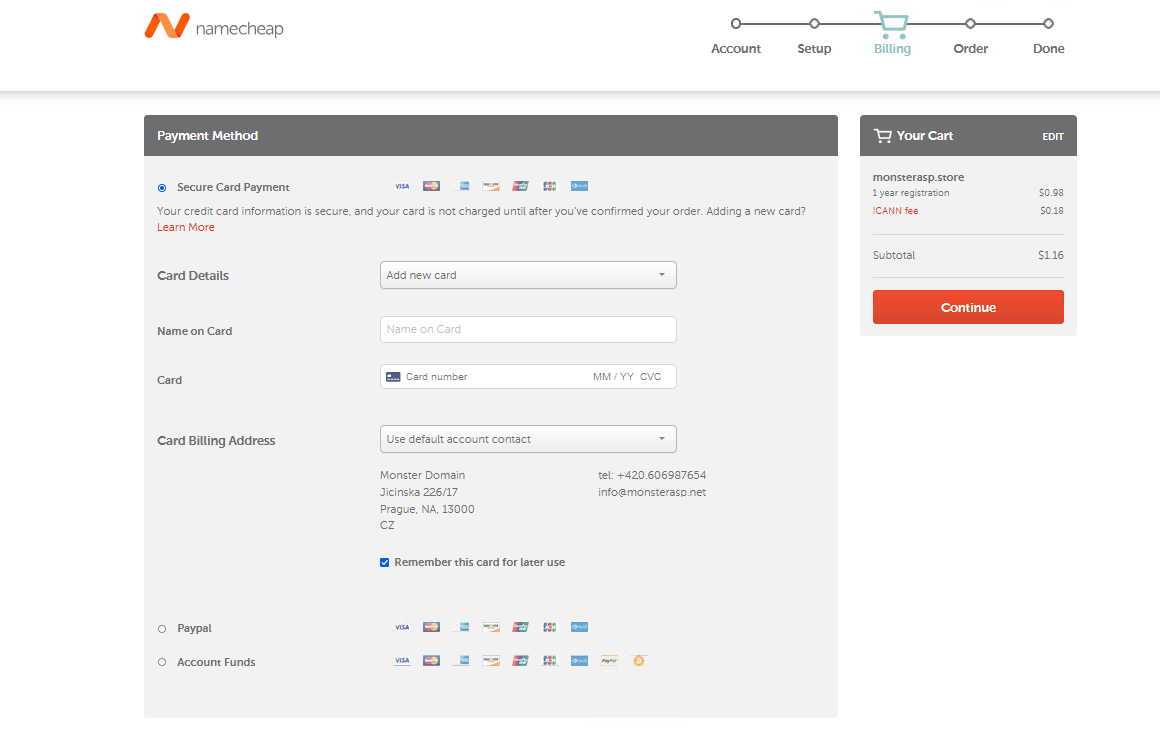
5. Payment:
- Review your order and proceed to payment.
- Namecheap offers several payment methods, including credit cards and PayPal.
6. Complete Registration:
- After successful payment, you’ll see Purchase Summary with note: "Now is a good time to set up the DNS for your domain."
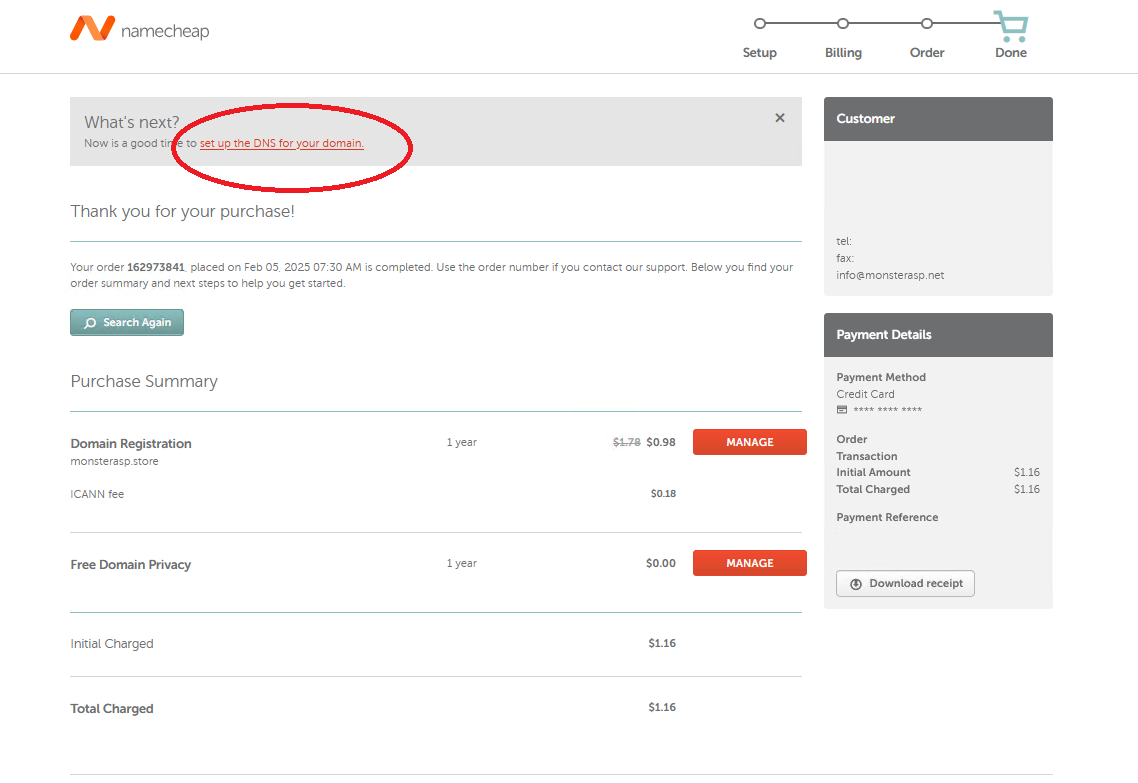
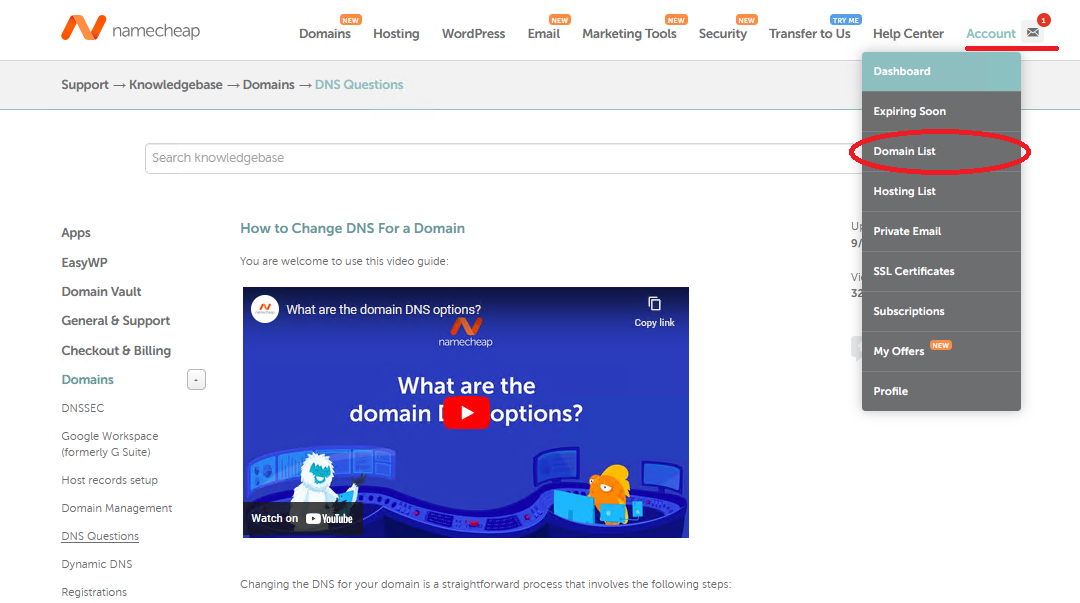
After clicking on the note "Now is a good time to set up the DNS for your domain," you will be redirected to the Namecheap knowledge base. At the top, click on your account and select the "Domain List" option.
7. Namecheap Domain List
In your Namecheap account, you will now see your newly registered domain.
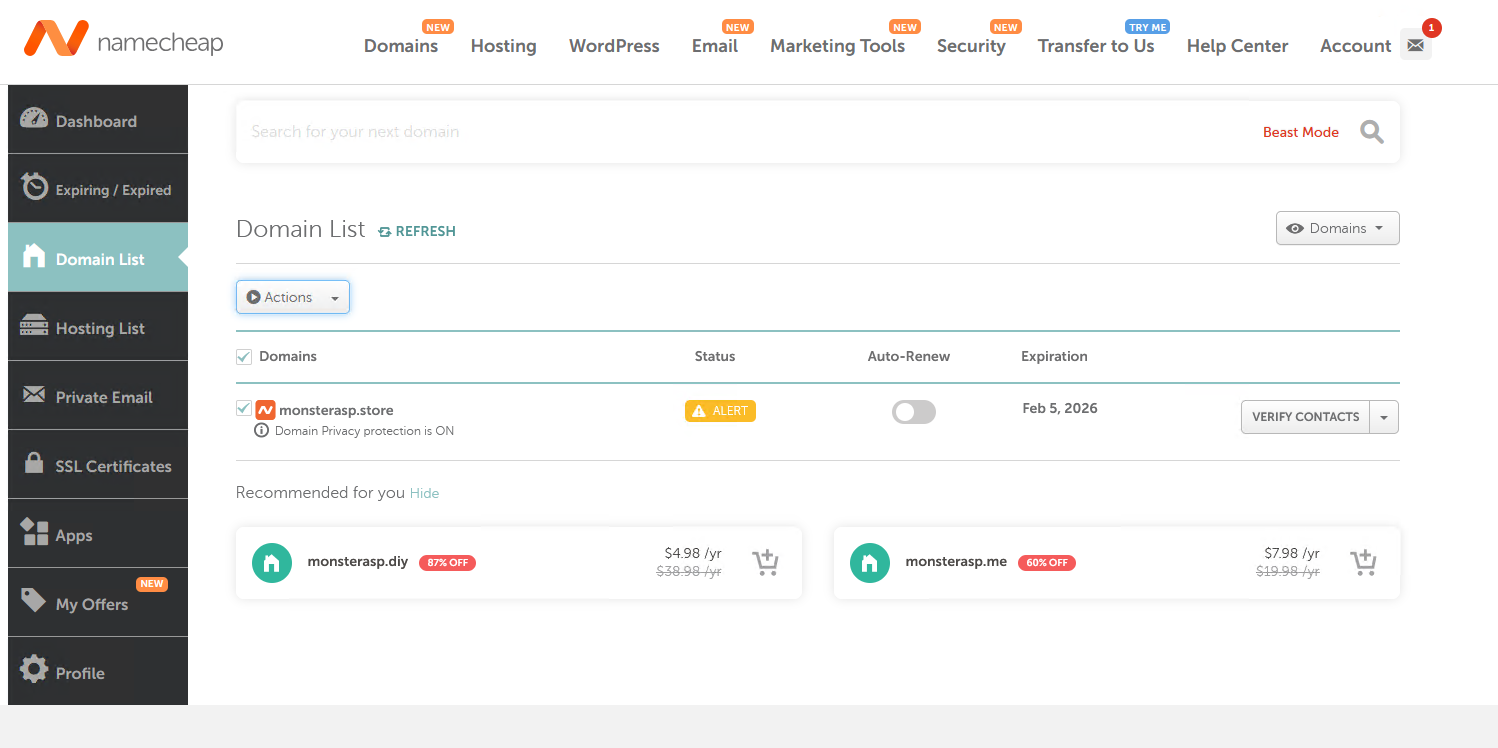
8. DNS servers for registred domain
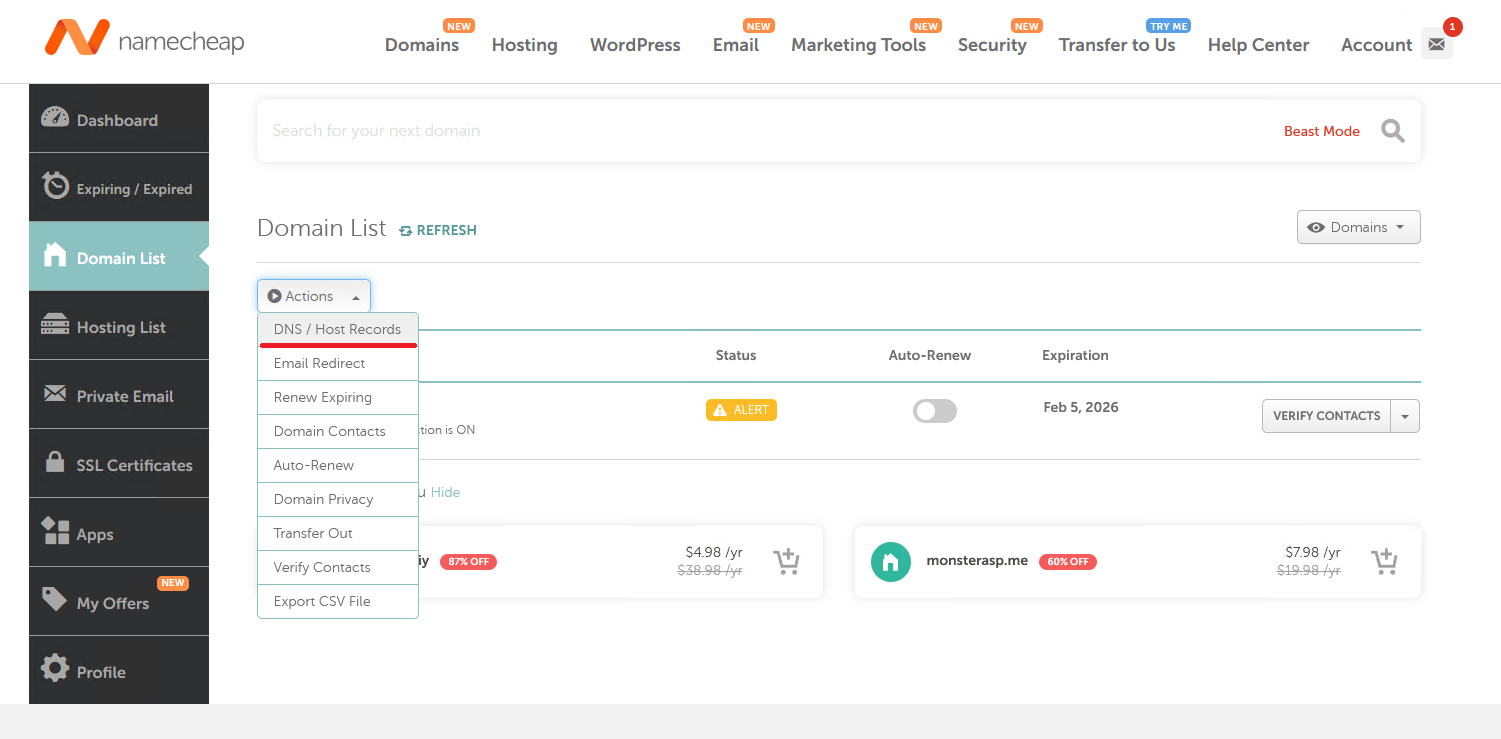
Select your domain, click on the "Actions" button, and choose "DNS / Host Records."
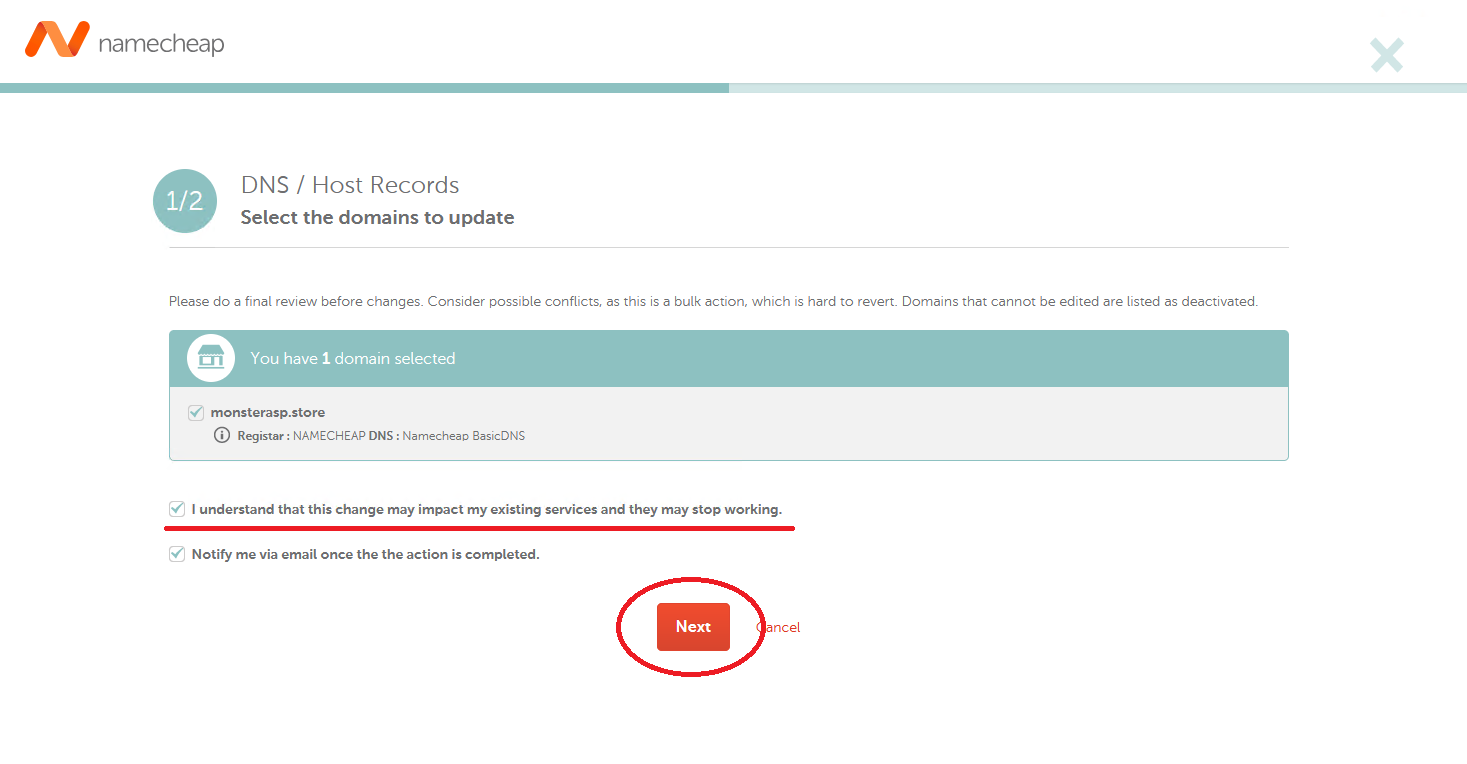
Now you need to select the option: "I understand that this change may impact my existing services and they may stop working."
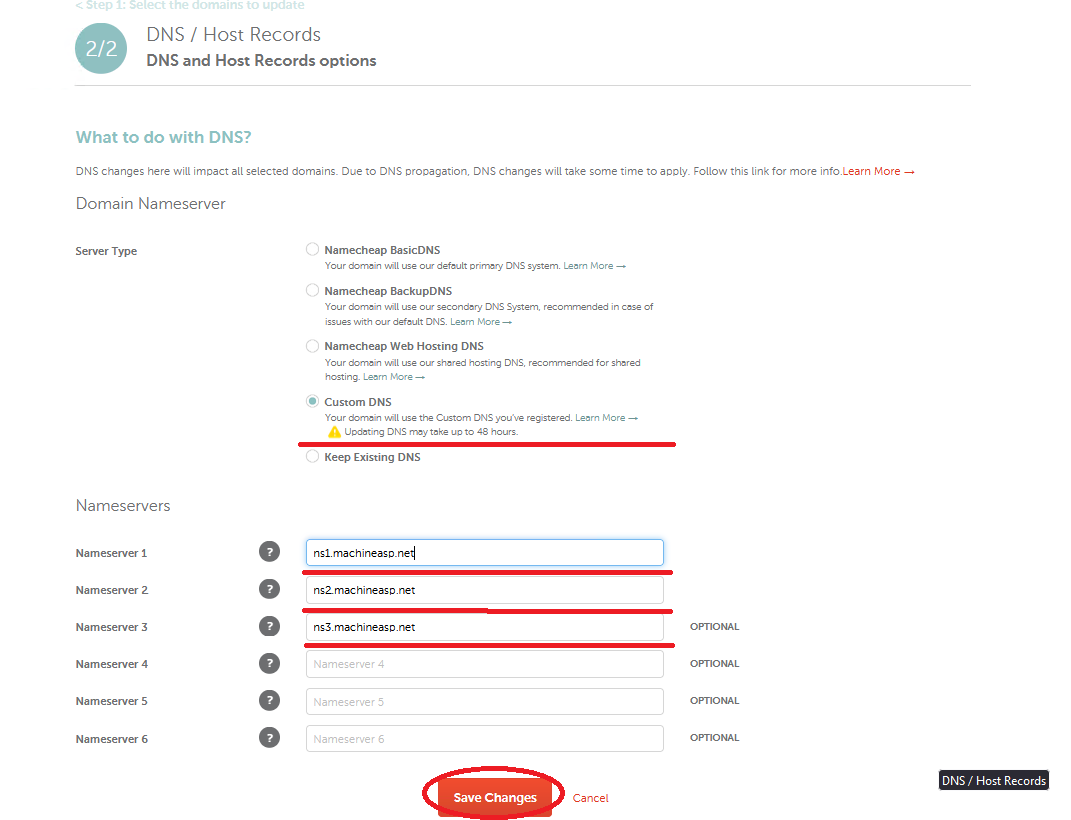
In the next step, we will set the DNS servers to MonsterASP.net so that your new domain can be managed in the control panel. Click on CUSTOM DNS. Than We set the following DNS servers:
ns1.machineasp.net
ns2.machineasp.net
ns3.machineasp.net
After that, you’ll be able to manage the entire domain directly through our control panel.
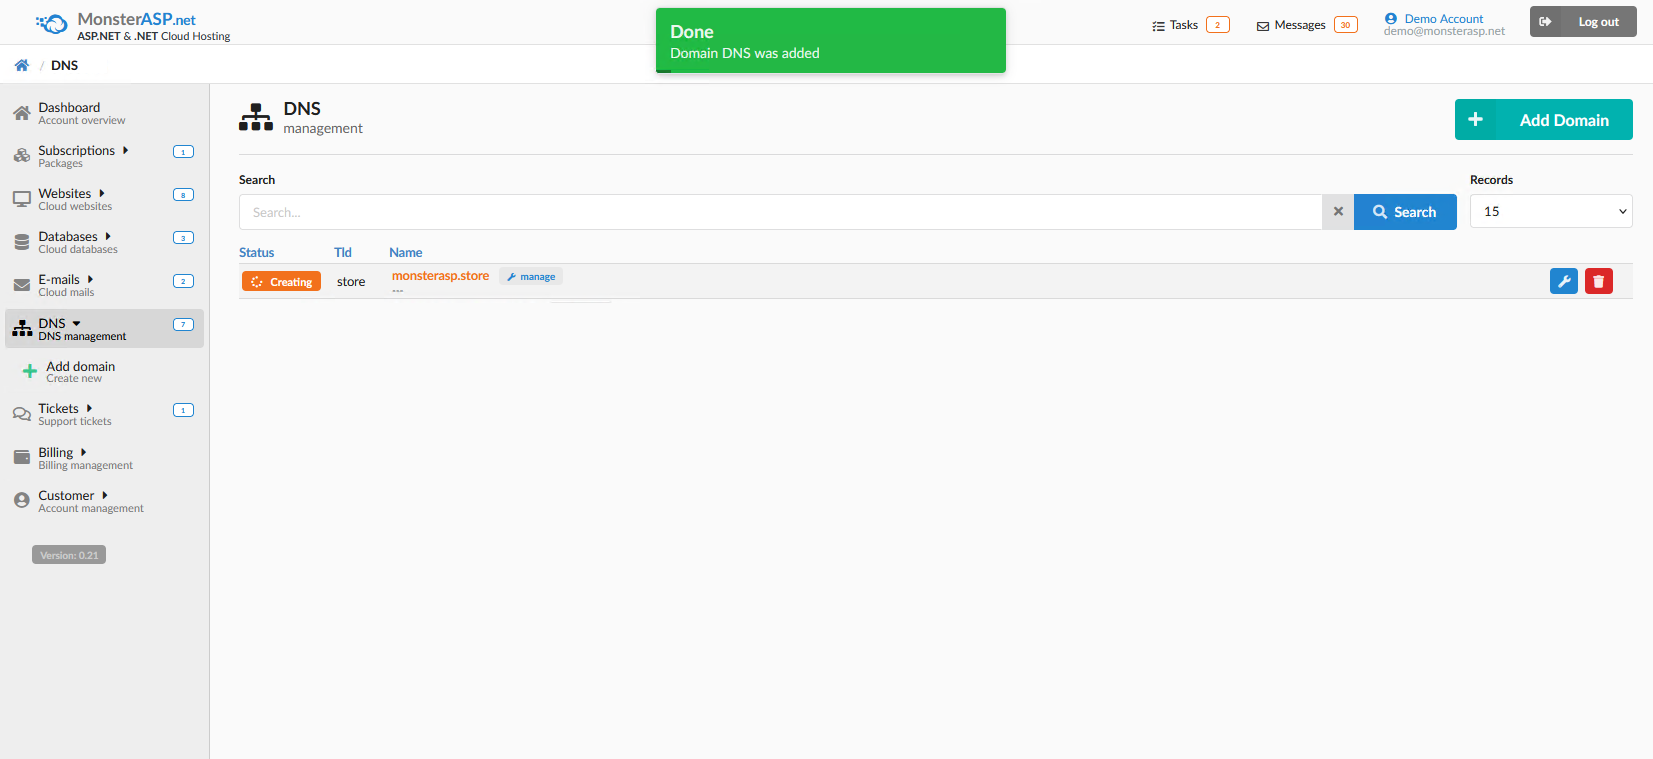
Now log in to the administration panel at https://admin.monsterasp.net/login. Then, select the "DNS" option from the menu and click on Add Domain.
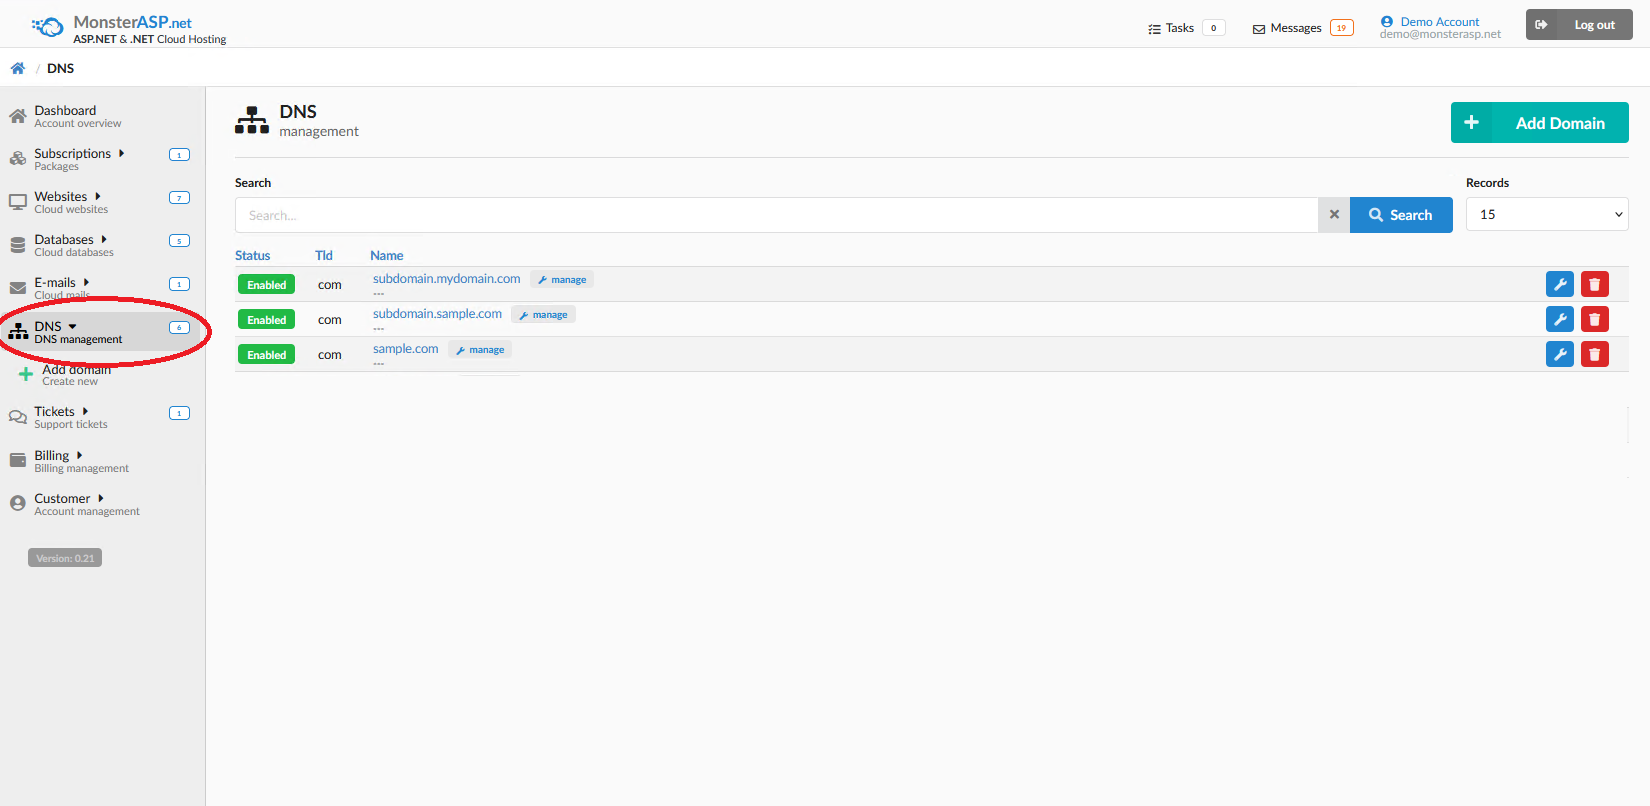
Add domain
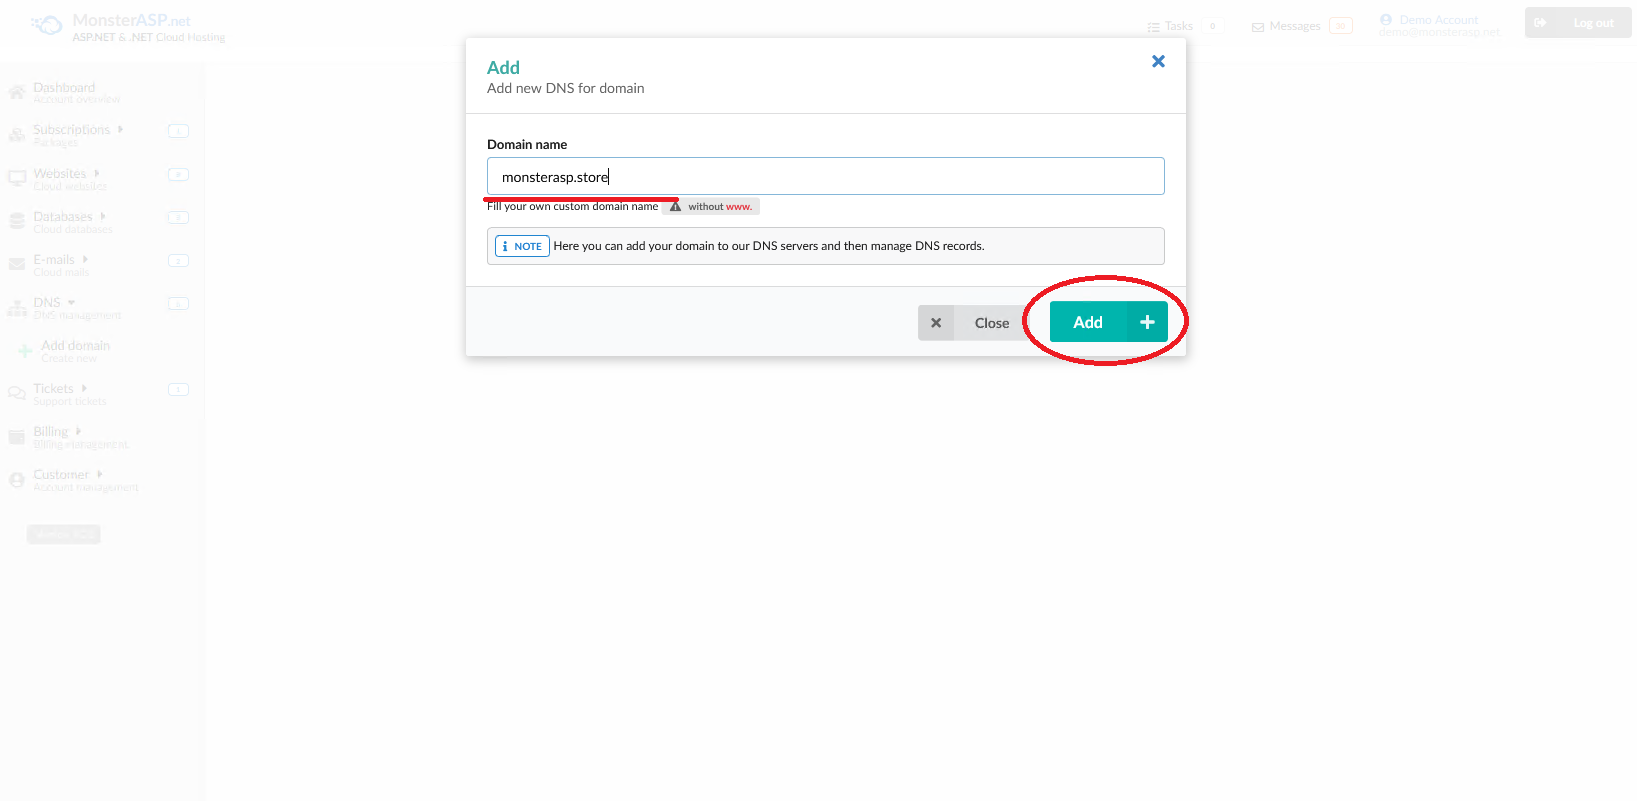
Done. You have a new domain and can manage it with us.