How to run Node.js application
This article contains steps how to run Node.js application on MonsterASP.NET hosting.
ASP.NET / .NET freehosting
If you don't already have our ASP.NET / .NET freehosting, sign up for FREE at https://MonsterASP.net/.
1) Initial setup (Create website)
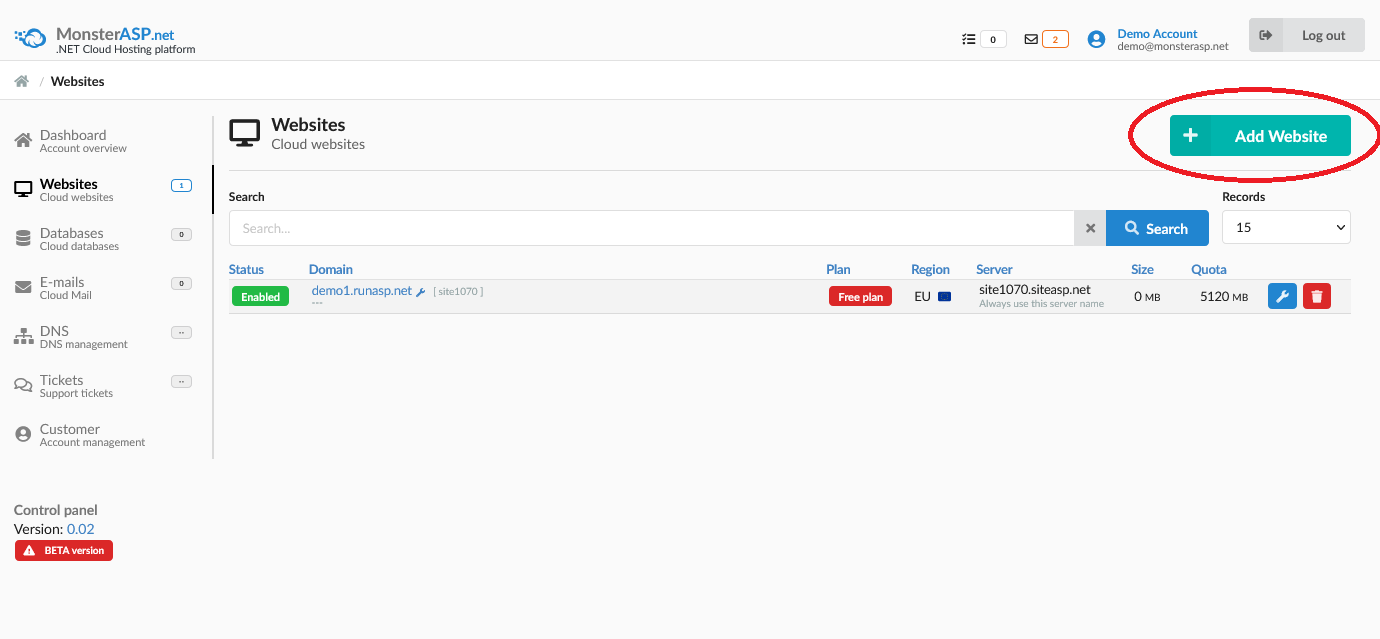
Create website from our hosting Control panel.

2) Create sample script
Create sample server.js script with this content:
server.js
var http = require('http');
var os = require('os');
var url = require('url');

http.createServer(function (req, res) {
    res.writeHead(200, { 'Content-Type': 'text/html' });

    let currentPath = process.cwd();
    let scriptPath = __dirname;

    let protocol = req.headers['x-forwarded-proto'] || 'http';
    let currentUrl = protocol + '://' + req.headers.host + req.url;

    const envVariables = [
        "PORT",
        "HTTP_PLATFORM_IIS_APP_POOL_ID",
        "HTTP_PLATFORM_IIS_SITE_ID",
        "HTTP_PLATFORM_IIS_SITE_NAME",
        "HTTP_PLATFORM_IIS_VERSION",
        "HTTP_PLATFORM_IIS_HTTPAUTH",
        "HTTP_PLATFORM_PORT",
        "HTTP_PLATFORM_TOKEN",
        "HTTP_PLATFORM_APPL_PATH",
        "HTTP_PLATFORM_IIS_WEBSOCKETS_SUPPORTED"
    ];

    let html = `
        <h1>Server Information:</h1>
        <ul>
            <li><strong>Node version:</strong> ${process.version}</li>
            <li><strong>Environment:</strong> ${process.env['NODE_ENV']}</li>
            <li><strong>Working Directory:</strong> ${currentPath}</li>
            <li><strong>Script Path:</strong> ${scriptPath}</li>
        </ul>

        <h2>Request URL:</h2>
        <ul>
            <li><strong>Current URL:</strong> ${currentUrl}</li>
            <li><strong>Host:</strong> ${req.headers.host}</li>
            <li><strong>Original URL:</strong> ${req.headers['x-original-url'] || 'Not set'}</li>
            <li><strong>Rewrite URL:</strong> ${req.headers['x-rewrite-url'] || 'Not set'}</li>
            <li><strong>Protocol:</strong> ${req.headers['x-forwarded-proto'] || 'http'}</li>
        </ul>

        <h2>Environment Variables:</h2>
        <ul>
    `;

    envVariables.forEach(variable => {
        html += `<li><strong>${variable}:</strong> ${process.env[variable] || 'Not set'}</li>`;
    });

    html += `
        </ul>

        <h2>Request Headers:</h2>
        <ul>
    `;

    for (let header in req.headers) {
        html += `<li><strong>${header}:</strong> ${req.headers[header]}</li>`;
    }

    html += `
        </ul>
    `;

    res.end(html);
}).listen(process.env.PORT || 3000);
Save sample script as server.js file.
Most important thing to do in your Node.js applications is to change static listening port (3000/5000/8080) to dynamic port get from PORT environment variable:
Example:
app.listen(process.env.PORT || 3000)
3) Upload script server.js
Upload script server.js to /wwwroot directory on your Website. You can use FTP/SFTP access to upload script file.
How to publish files via FileZilla Client
4) Upload web.config file
To run Node.js application you must also upload configuration web.config file to /wwwroot directory which contains necessary configuration for Node.js.
web.config (necessary configuration file)
<configuration>
  <system.webServer>

    <handlers>
      <add name="httpPlatformHandler" path="*" verb="*" modules="httpPlatformHandler" resourceType="Unspecified" />
    </handlers>

    <httpPlatform processPath="node" arguments=".\server.js" startupTimeLimit="20" stdoutLogEnabled="false" stdoutLogFile=".\logs\node">
      <environmentVariables>
        <environmentVariable name="PORT" value="%HTTP_PLATFORM_PORT%" />
        <environmentVariable name="NODE_ENV" value="production" />
      </environmentVariables>
    </httpPlatform>

  </system.webServer>
</configuration>
Folder \wwwroot is website root and server.js and web.config files must be located in this directory.
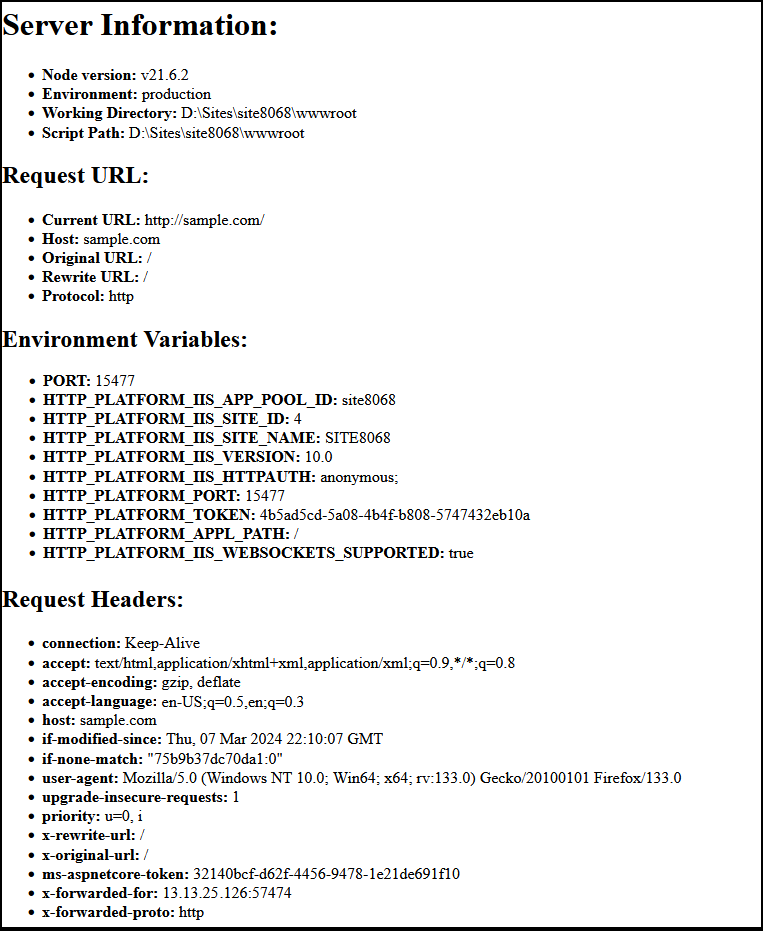
After uploading both files to your website this information from sample script will be displayed in browser when website URL is open:

You do not need to run any command line like npm or node to host Node.js application on MonsterASP.NET.
Node modules must be uploaded to node_modules directory. You must install all required node modules locally using npm before upload application on Website.
