How to activate HTTPS with Lets Encrypt certificate
This article provides steps how to enable HTTPS with Lets Encrypt on your Website.
ASP.NET / .NET freehosting
If you don't already have our ASP.NET / .NET freehosting, sign up for FREE at https://MonsterASP.net/.
-
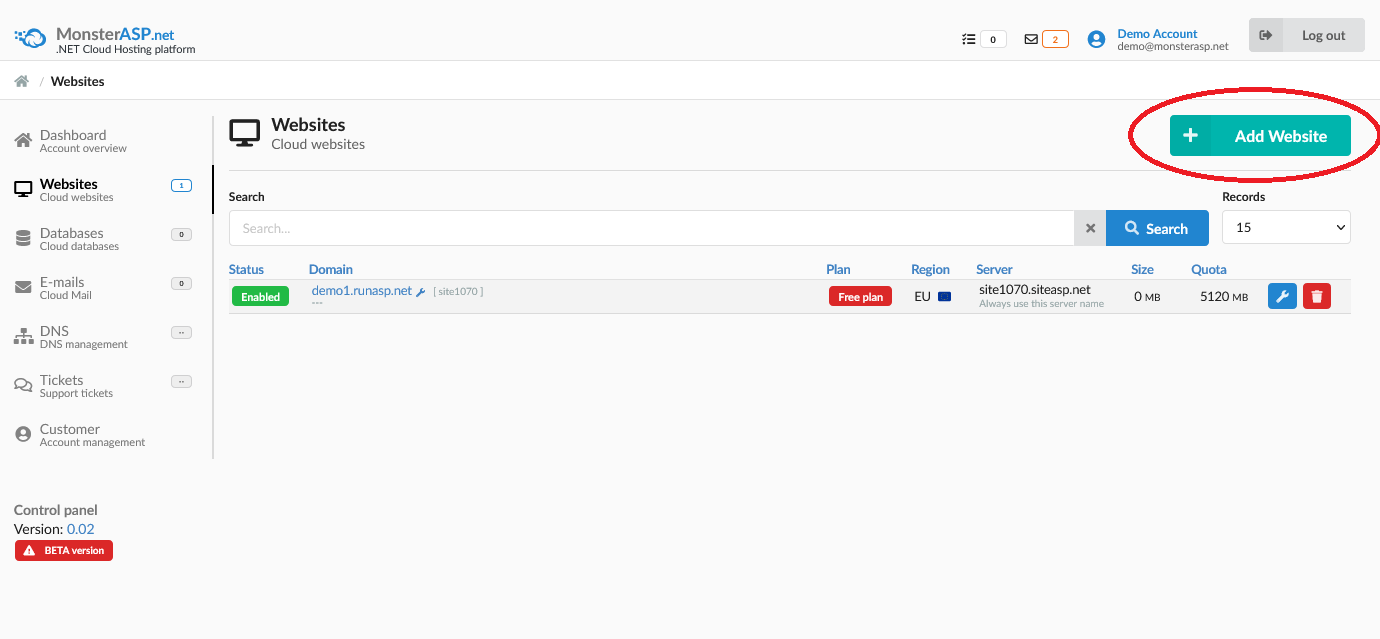
Initial Setup
Create a website from our hosting Control panel.
-
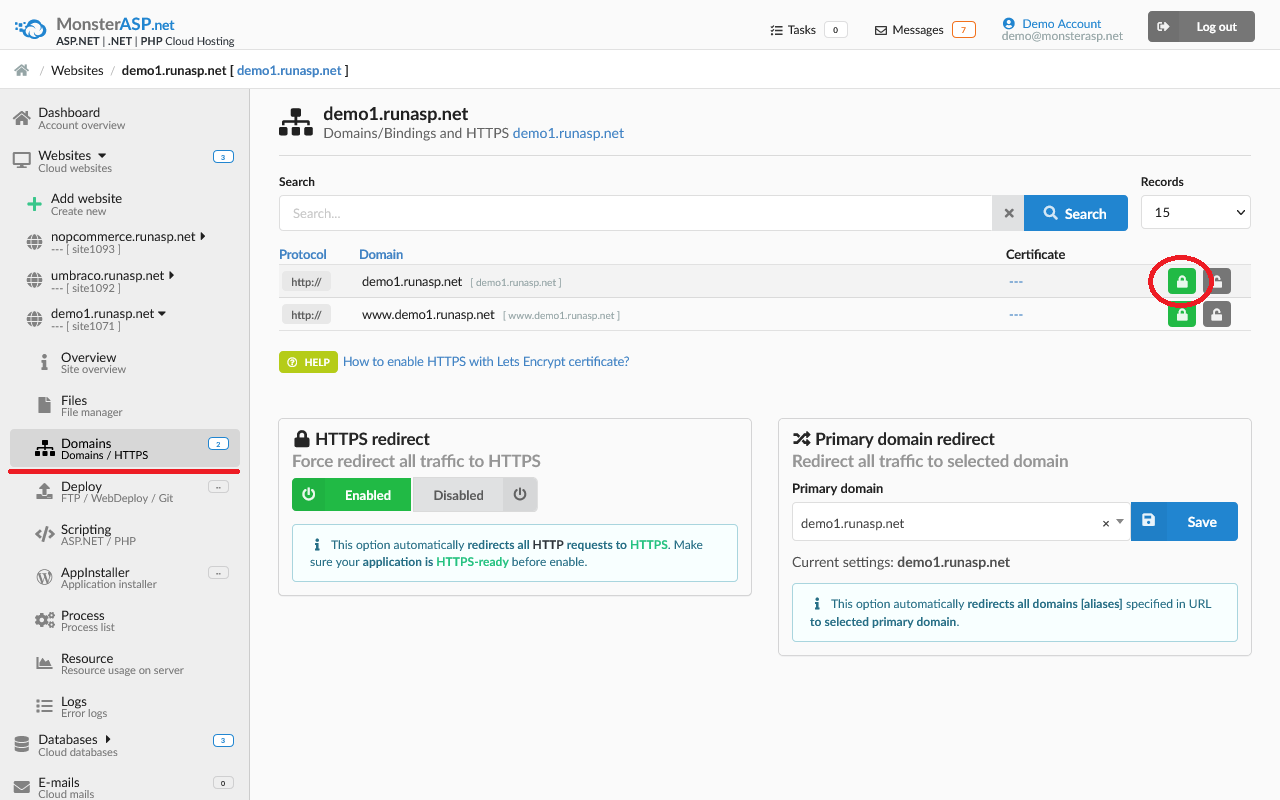
Enable HTTPS
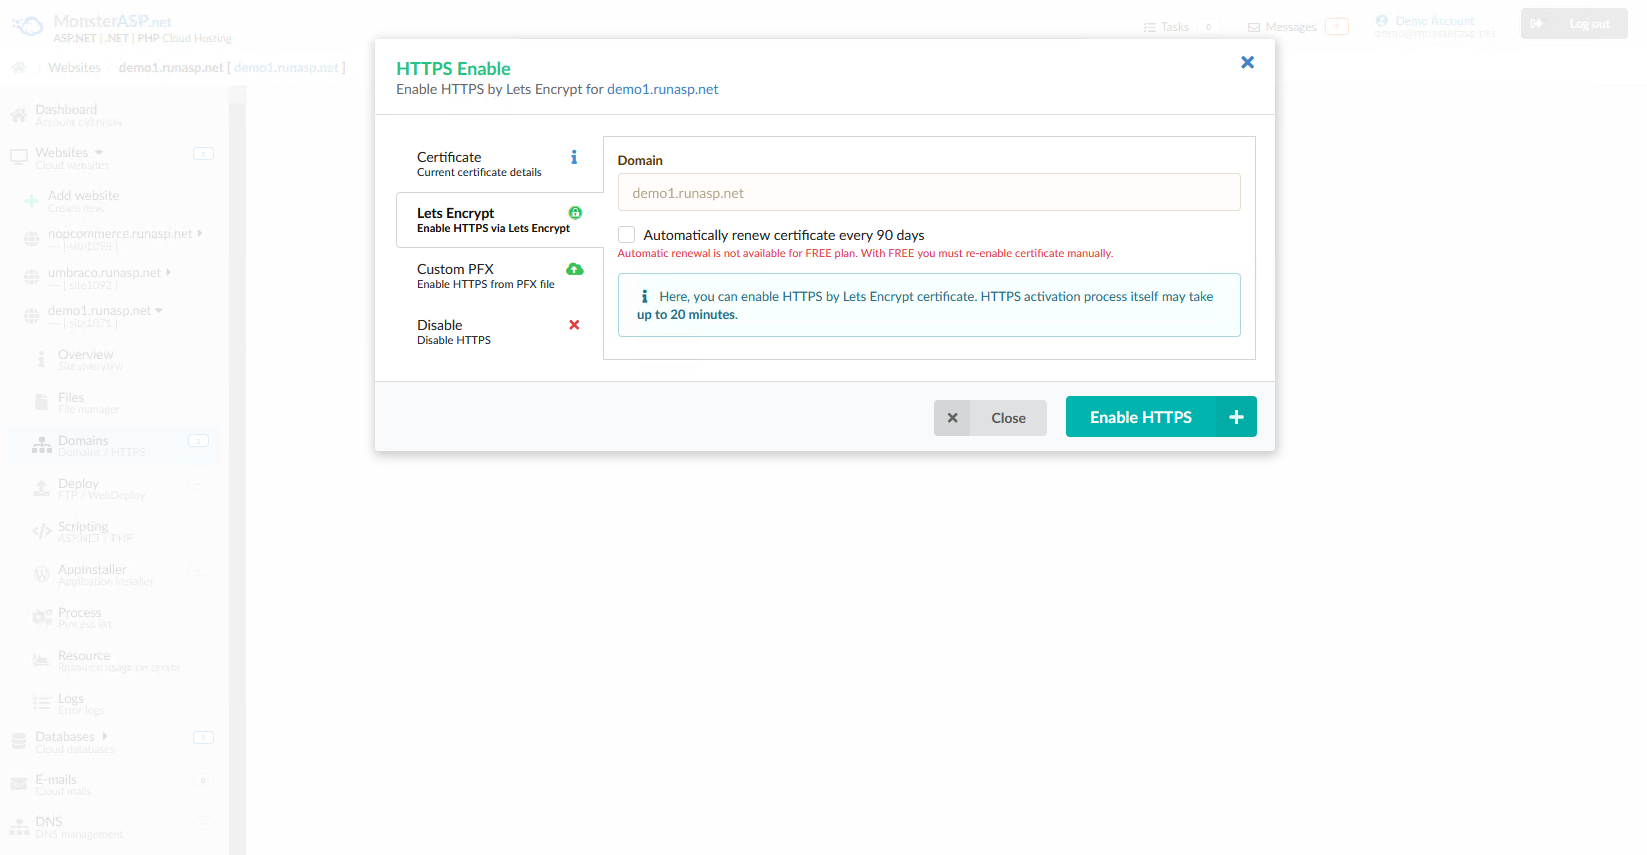
After clicking on green lock we see several options.
- Certificate: Shows current installed certificate - in our case, it's currently empty.
- Lets Encrypt: Activate Let's Encrypt certificate. This certificate will be valid for 90 days. With FREE hosting you must renew it manually. With PAID hosting plan it renews automatically.
If you have FREE hosting, you will need to renew certificate manually and repeat activation every 90 days.
- Custom PFX: Allows you to upload your own SSL certificate in *.PFX format including import password.
NOTE: It must be SSL certificate issued for selected domain. Any other SSL certificate cannot be used.
Select your option and click at bottom right Enable HTTPS.
-
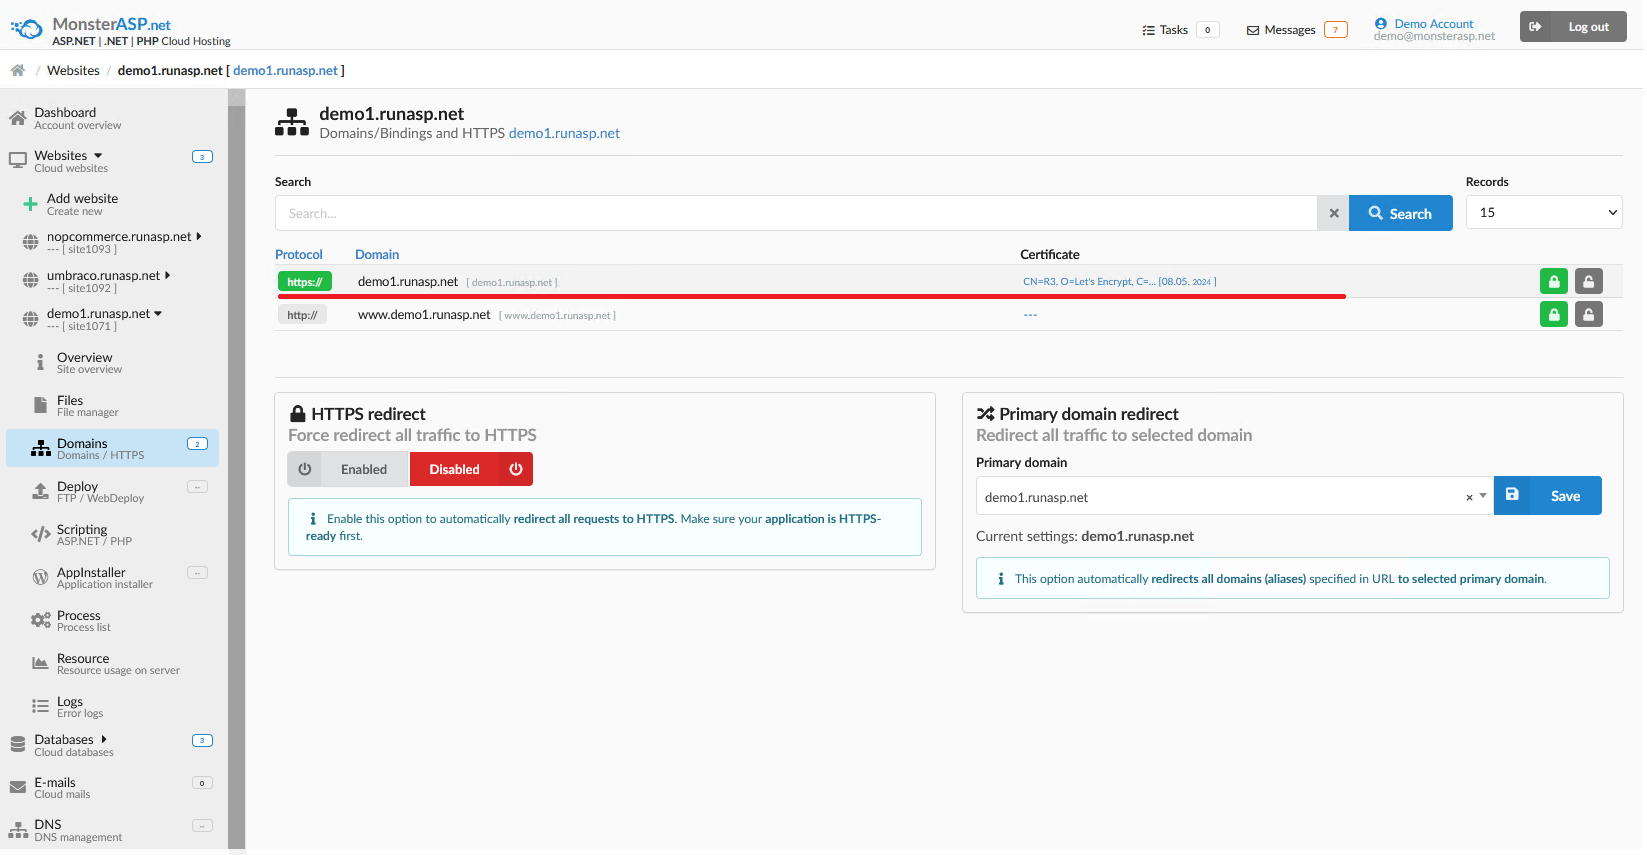
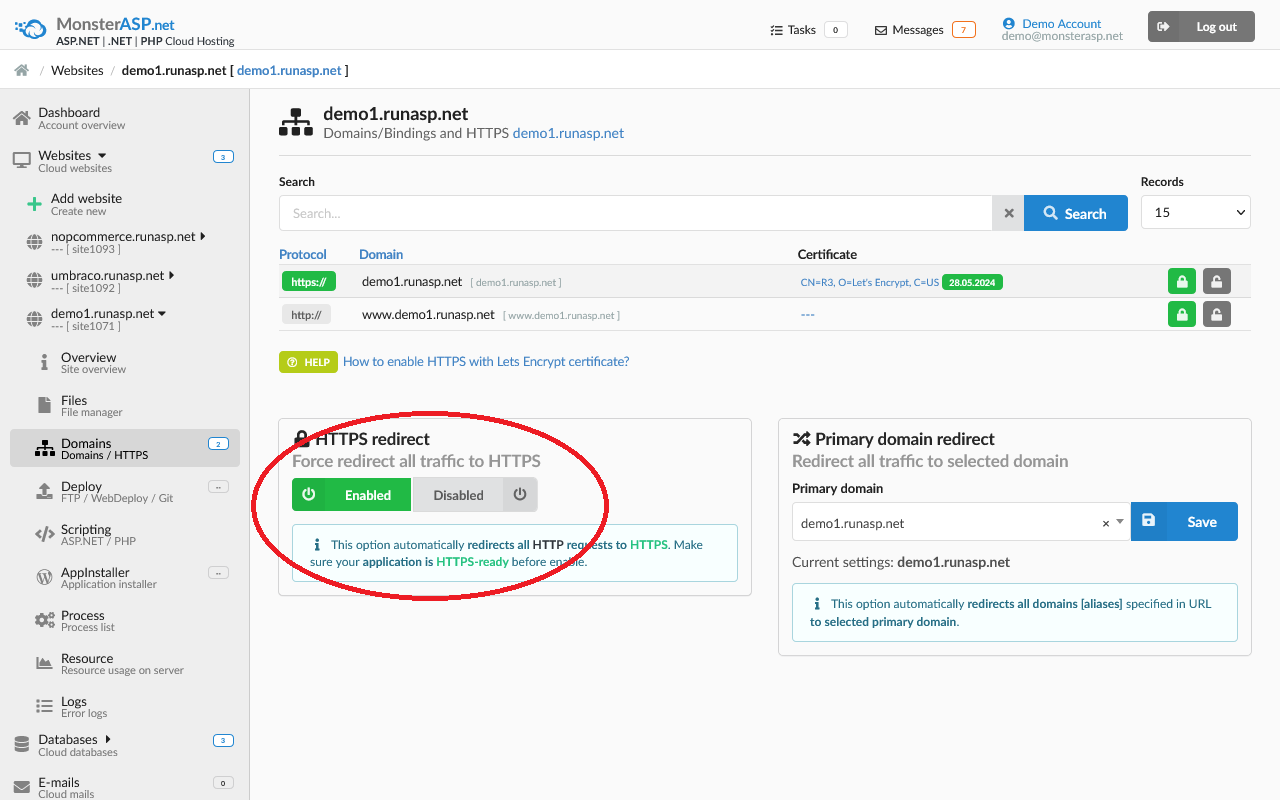
Check active HTTPS
After activating HTTPS for specified domain, we see active HTTPS protocol (highlighted in green) and type of certificate including expiration date.
-
Redirect HTTP --> HTTPS
In additional settings, you can directly activate automatic redirection from HTTP to HTTPS. Just click on Enabled button next to HTTPS redirect.
NOTE: Make sure your application is HTTPS-ready before enable this option.
-
Congratulations, it's done.
Now is your Website secured by HTTPS.